Welcome, money makers! How about powering your online business with one landing page without a website? Sprint creation of sleek & plain pages that generate higher revenues from ads. We’ll go through Google Sites, WordPress, Blogger, and Wix platforms.
Why should you create a landing page without a website?
You need to create a landing page without a website for these reasons:
- Focus readers on one topic, one message or one advertising link
- Direct traffic precisely to this page.
- Earn revenues from ads that are not allowed on Facebook or other networks.
Let’s unwrap the last point a bit. You probably know how to generate Facebook traffic and earn from sponsored content. However, Meta doesn’t allow putting ad links in posts or stories. Can you still monetize traffic from social media? Of course! You will need a landing page where ads are allowed! It will only take 10 to 30 minutes to make one instead of creating and optimizing a huge website.
Finally, you’ll be able to send Facebook traffic to this page and earn from those users who click on ads. Adsterra offers high CPM rates for social traffic, therefore, you can expand your monetization strategy!
How do I make money with one page only?
Here’s the formula for how to make money with a landing page without a website:
- Register on Adsterra and create a Direct Link (aka Smartlink). It’s recommended to allow all advertising types to boost CPM rates.
- Place this Link on a landing page as any other URL: add to texts, images, buttons, or else.
Social media can block complex URLs with ads or estimate them as spam. Here’s why many publishers resort to URL shorteners.
- Start posting on Facebook, urging users to visit the page.
- Users coming from Facebook will click the Link and watch ads.
- You’ll get paid for views and conversions.
Now, let’s learn how to easily create a page for placing advertising codes without making a multi-page website.
How do I make money with one page only?
Landing pages in Google Sites
1. Log in to start
- Go to Google Sites.
- Log in with your Google account.
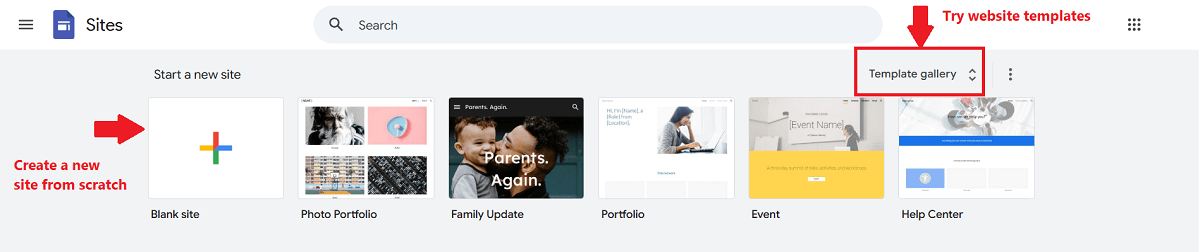
2. Choose a template or create from scratch
- Click the “+” button to create a new site from scratch.
- Or navigate the Gallery and select a clean, minimal template.
3. Add necessary sections or blocks
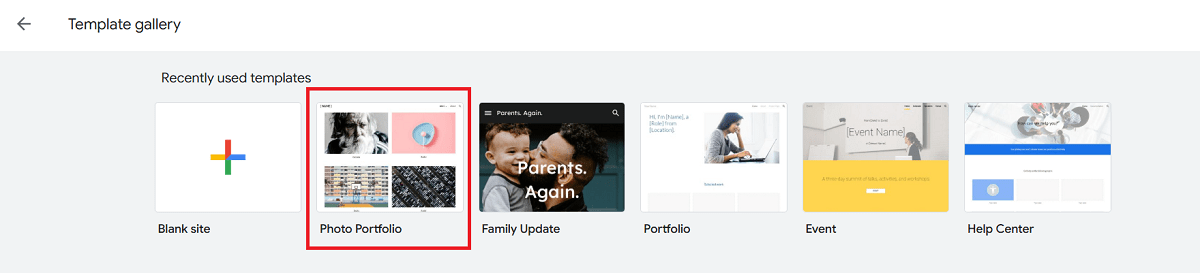
Minimal pages work best. If you don’t plan to promote an online course or sell something, a couple of blocks with content are enough. In our example, we’ll work with a Photo Portfolio template.
- Use image blocks to insert compelling visuals that will make users click
- Add descriptions that prompt high interest
- Include buttons with clear calls to actions depending on what you offer the audience (“Get Now,” “Watch Now,” “Download for FREE”)
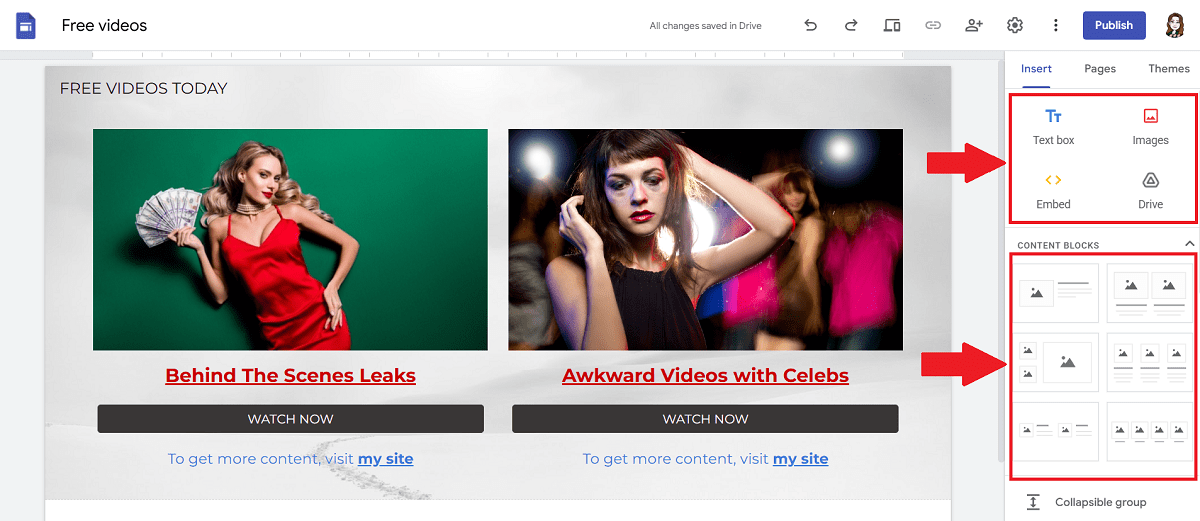
- Distribute Direct Links to get more clicks:
In the example below, a publisher creates a landing page for monetization.
*We were asked to replace real covers with stock photos to depersonalize this page.
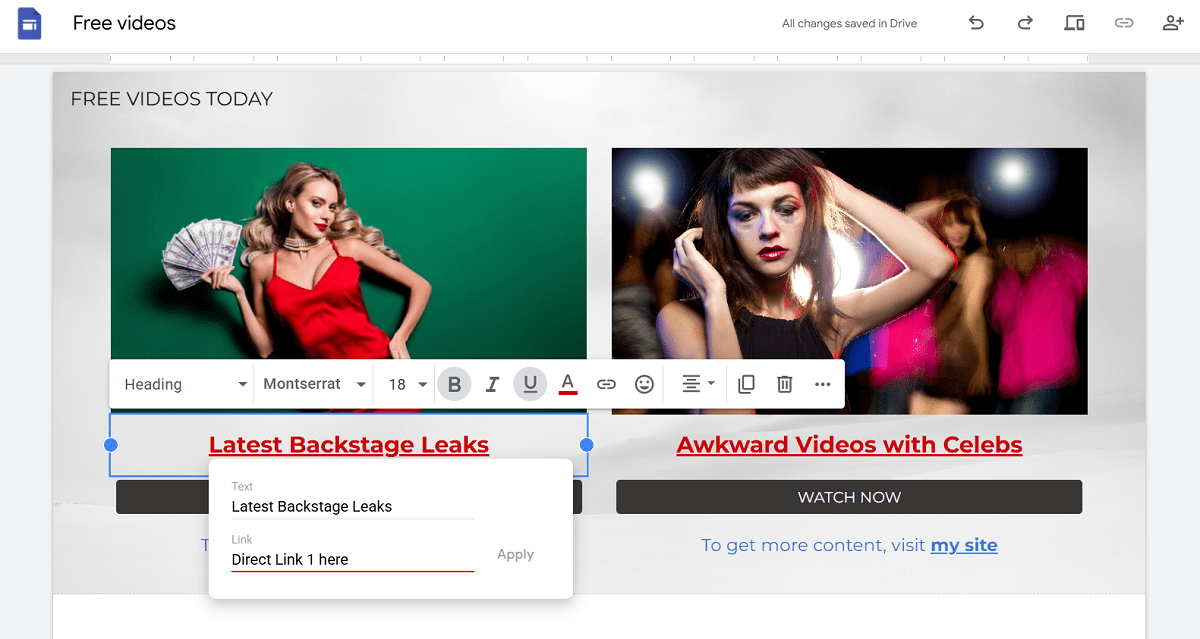
- Direct Links are attached to images while the WATCH NOW buttons lead to the content.
- Descriptions can also be converted into clickable texts.
- The publisher also provided an option to visit their multi-page site.
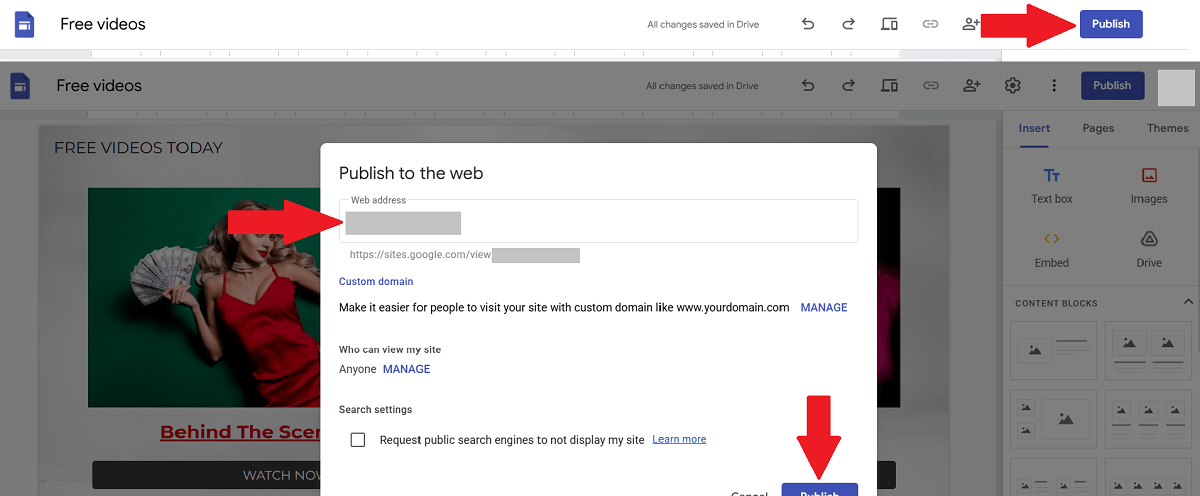
4. Preview and publish your landing page
From the top bar, click the Preview icon. Click between desktop and mobile previews and make sure content looks the way you need it.

- Choose a custom URL (e.g., sites.google.com/view/yourlandingpage).
- Make the page live by clicking the Publish button
We’ve got a powerful guide to launching sites based on Google platform, just in case you want to pursue your monetization goals further.
WordPress landing pages with no website
1. Register with WordPress.com
- Go to wordpress.com and click Get Started
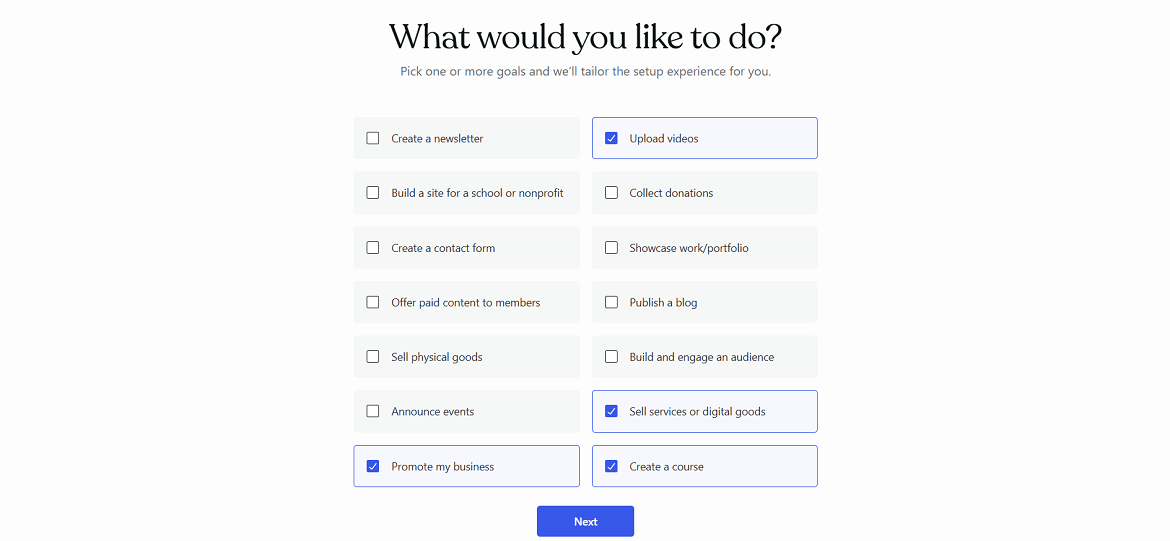
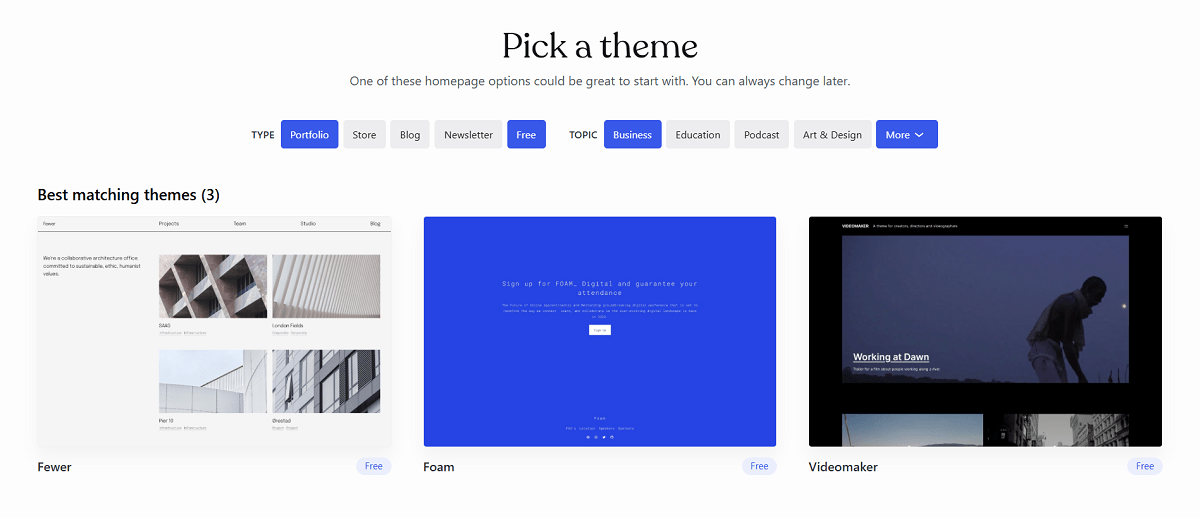
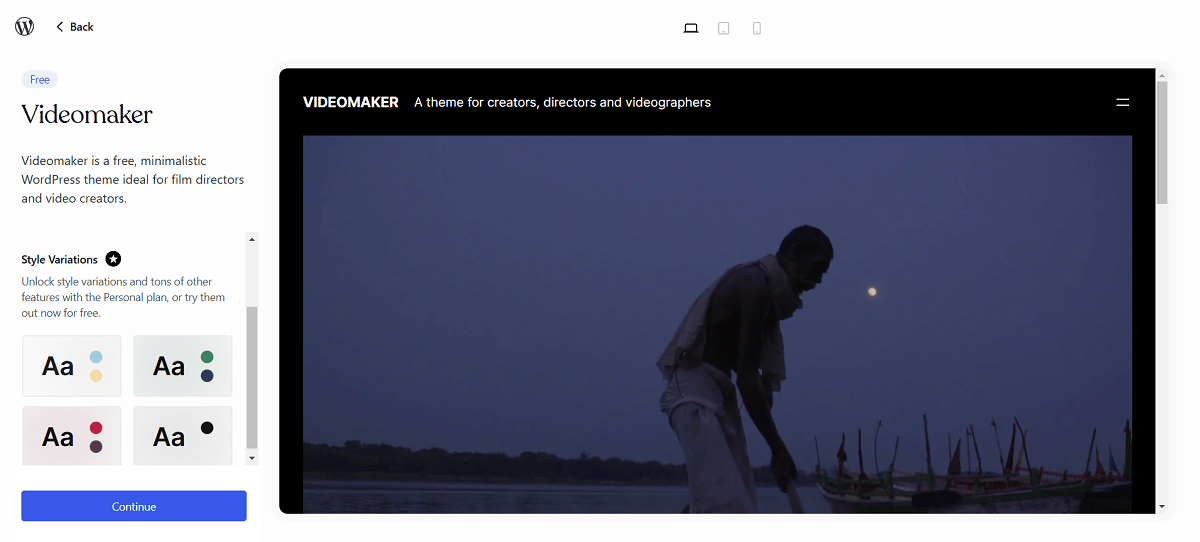
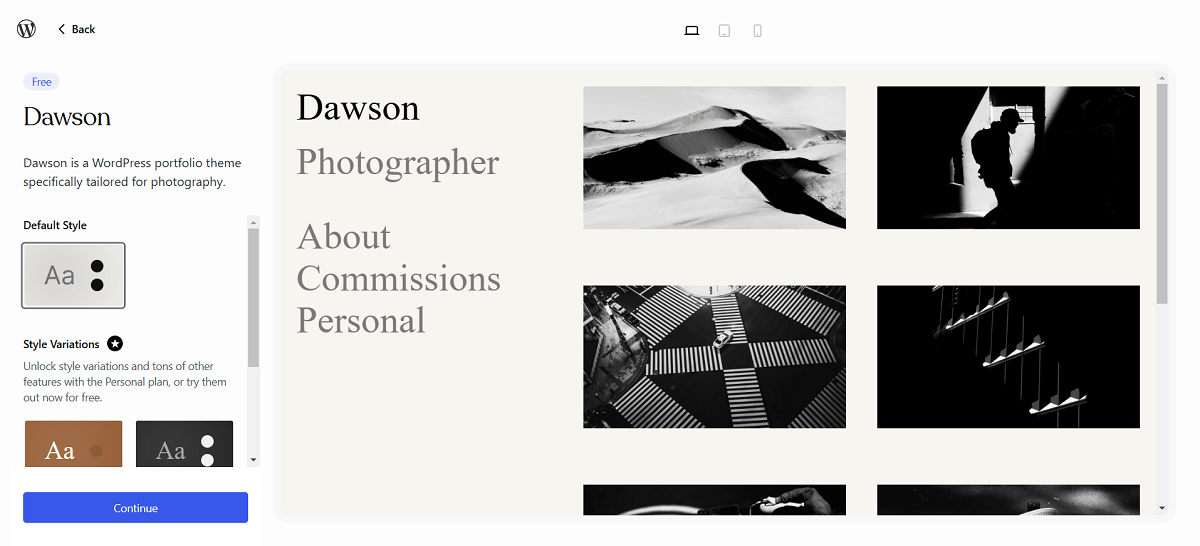
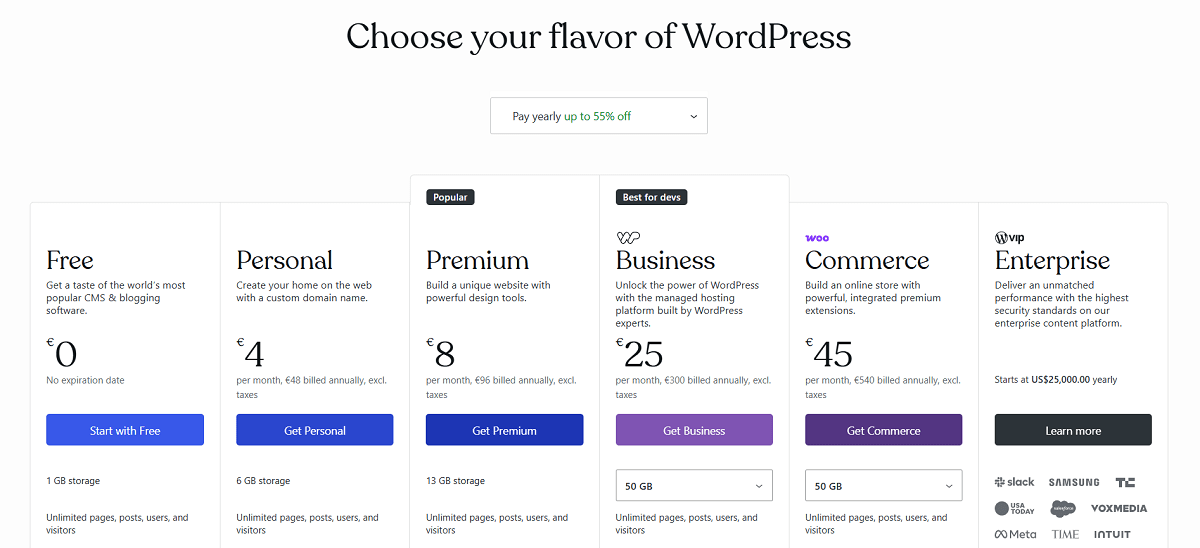
- Follow simple steps: choose the purpose(s) of your content, pick a theme and its colors
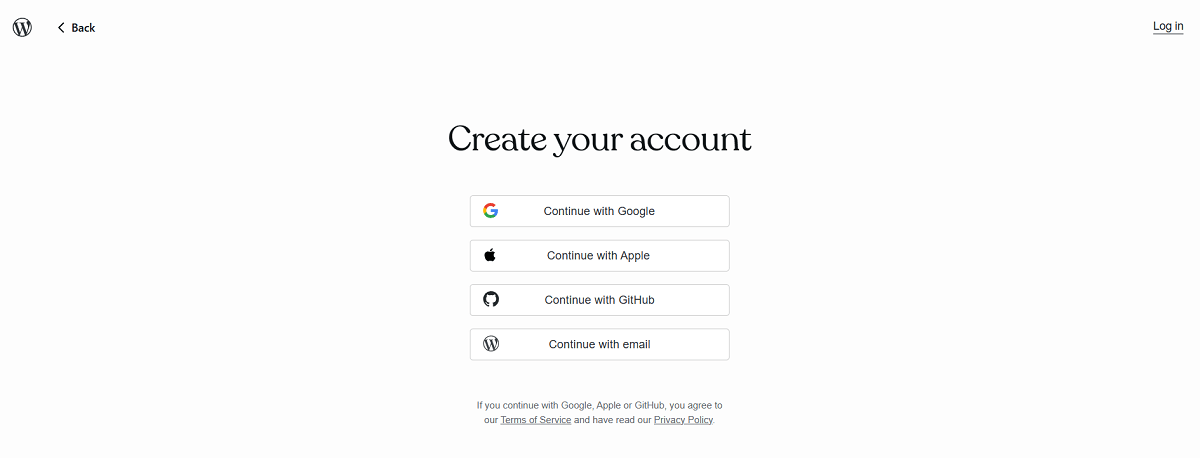
- Register with your email or Google account
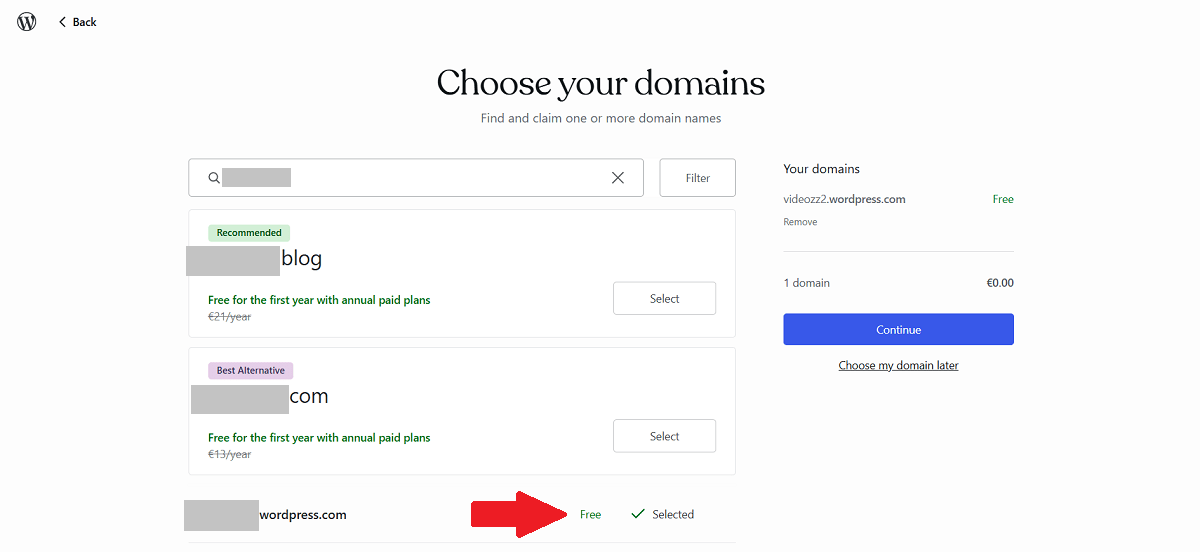
- Decide on a domain name (you can get a paid domain name or select a free type “______.wordpress.com”)
- Finally, choose your WP plan (we picked FREE)
2. Create a WordPress landing page
- Sign in to your WP account (if you registered with Google, WP will email a one-time entrance link every time you sign in)
- If you want to change the theme, click Appearance → Themes → and find the most suitable one (tip: use the Free filter to exclude paid themes)
- Select Edit Site from the Quick Links section

3. Create content
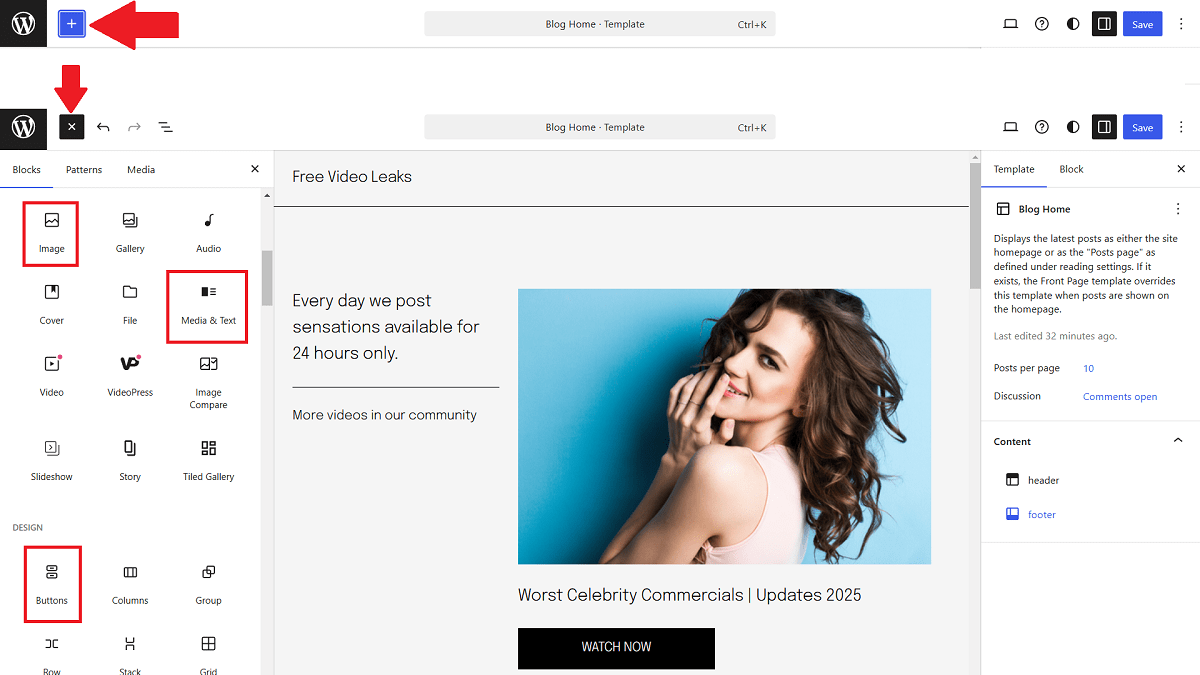
- Replace the placeholder title with yours (e.g., “Unlock Exclusive Benefits” or “Limited Access to Free Videos”).
- Use the “+” icon in the top bar to add content blocks
- Add images and descriptions
- Add CTA buttons or texts with links to the main content
4. Include Direct Links
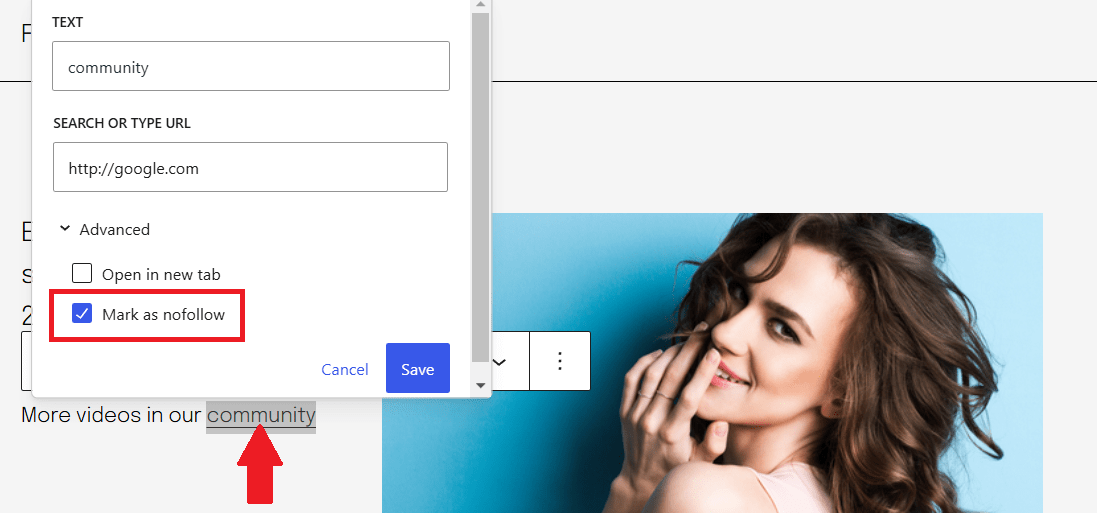
Place the Direct Link you took from Adsterra to noticeable content elements: headlines, images, buttons. For instance, to attach a link to a piece of text, select this text, hit the 🔗 icon, and paste the link.

Put the no-follow attribute to prevent robots from following these URLs.
5. Preview and publish the page
- After you finish the design, hit the preview icon and check how the page looks on desktop and mobile devices. Then click the Save button.
- Test all links and forms to ensure functionality.

Finally, click the Launch Site button.
Extra tips for WordPress landings without a website:
- When you create a mini-site or one-page site, remove unnecessary content. Open Settings → Writing and choose Pages for Post Types.
- Open Settings → Reading and pick Static for your homepage.
Landing pages on Blogger
Blogger is mainly used for building multipage sites and blogs. But you still can develop a minimal and fast landing page here. You will need to create a blog first. All landing pages will appear inside this blog like posts with unique URLs.
Example: “https://yourblog./blogspot.com/2025/02/free-videostoday.html”
Step 1: Log in and create a new post
- Go to Blogger and choose CREATE YOUR BLOG
- Log in with your Google account.
- Click the arrow-down icon and pick New Blog
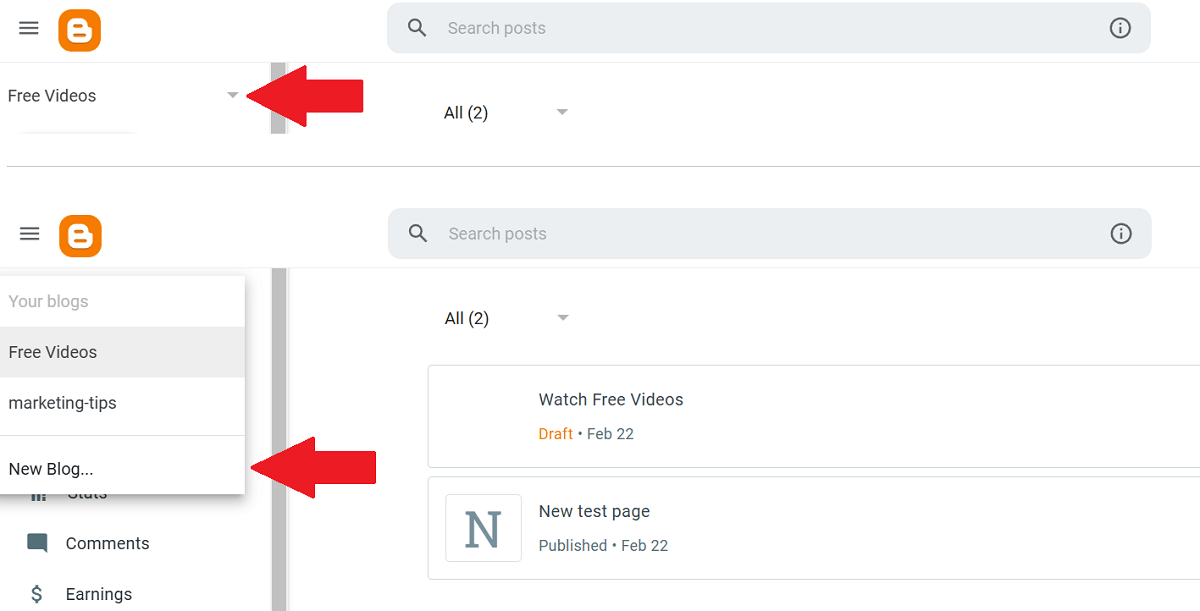
- Enter the blog’s name
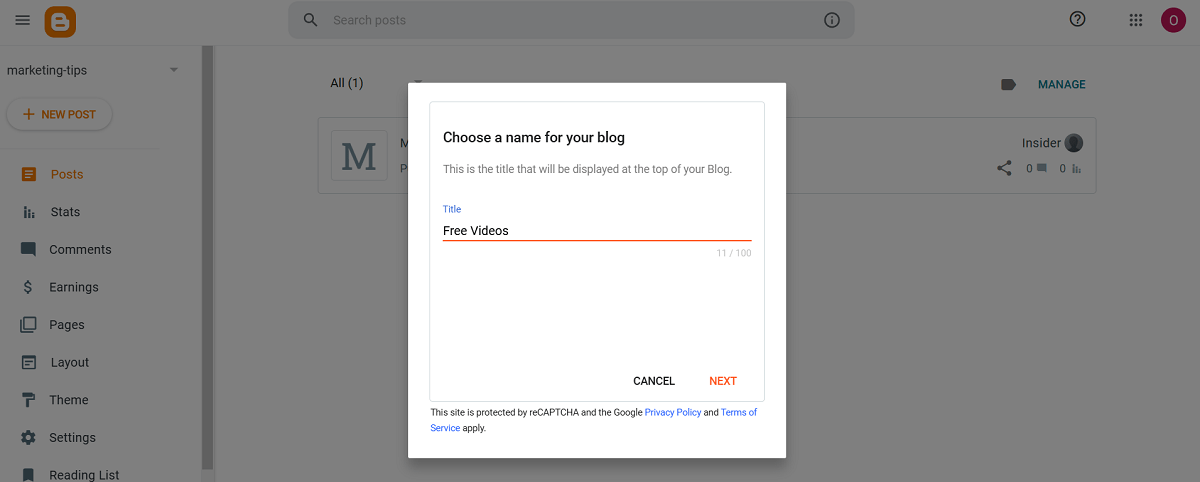
- Enter the blog’s URL
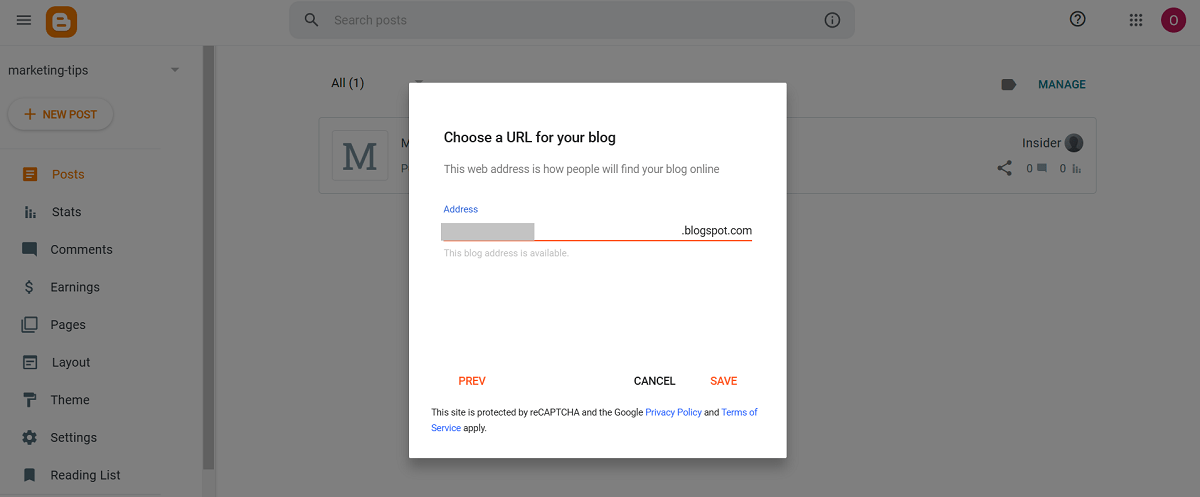
- Click Save.
2. Add main content
- Click New Post to create a landing page.
- Add images using the Image icon. To make an image clickable, select it and hit the link icon.

- Add headlines and descriptions needed
- Include spacers and dividers to make the content look neat.
3. Include necessary links
From the Editor dashboard, you can attach a URL to any element: images or texts. You can’t create buttons with this set of tools, so use simple text blocks and attach links. Select a piece of text and hit the 🔗 icon.

When adding a link, tick the “Add rel=nofollow attribute.” This will stop Google robots from following this link. Click Apply.
Use the same strategy as before: place Direct Links on visible elements along with the general URLs you want to include in the page.
4. Preview and publish your blog and page
- From the right, lick Permalink and add a custom slug for the landing page
- main menu, click Preview and check how the blog looks
- Click Publish and ensure all links work properly.

Using Wix to make landings without a website
Option 1: Sign up and choose a template
- Go to https://www.wix.com/ and hit Get started
- Sign up with your email or Google account. Confirm your email if you didn’t register with Google.
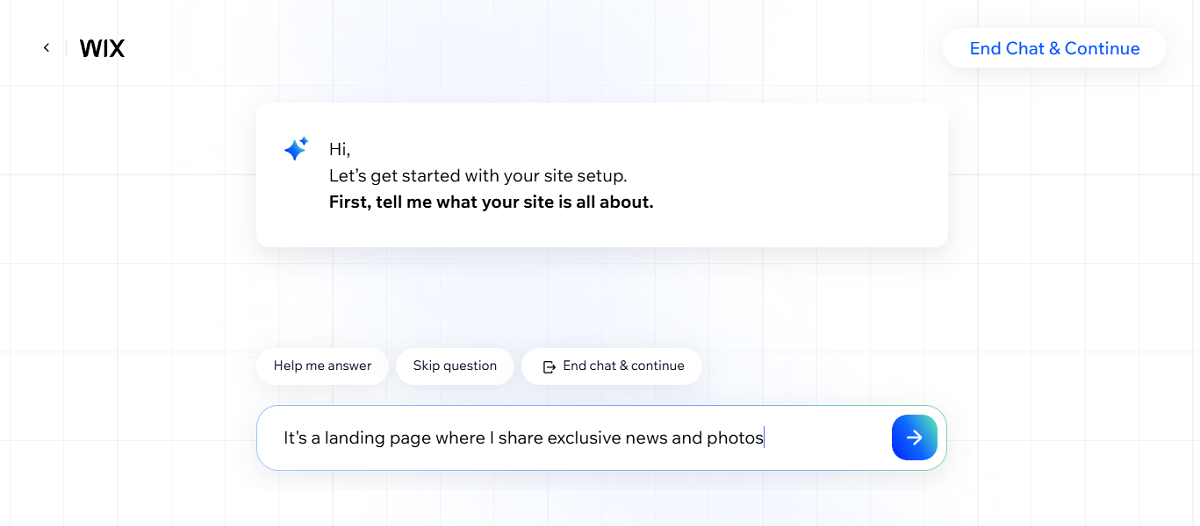
- You can now click Create New Site. You can skip the AI-powered wizard or try to make a landing with its help, but it can return a multipage site anyway.
- Once finished, jump to your Wix account and click Design site. You’ll be offered to continue designing with AI or pick a template: it’s up to you.
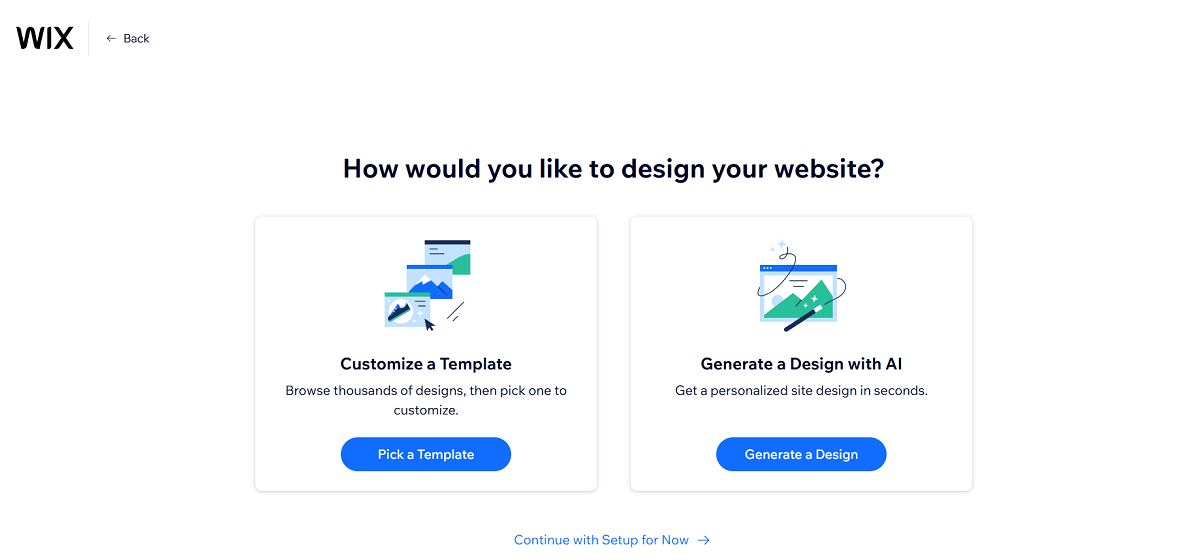
- From the template gallery (or with the help of Wix AI assistant), pick a simple site: it will usually be a Portfolio template. You’ll be able to remove unnecessary pages, then.
Option 2: Start with the Wix landing page
- Go to Wix Landing Page Builder and sign up as requested
- Choose between the two options: Get started or Choose a template. The choice of templates is quite poor, but sufficient for our goals.
- When the choice is made, click Edit this site.

3. Edit content
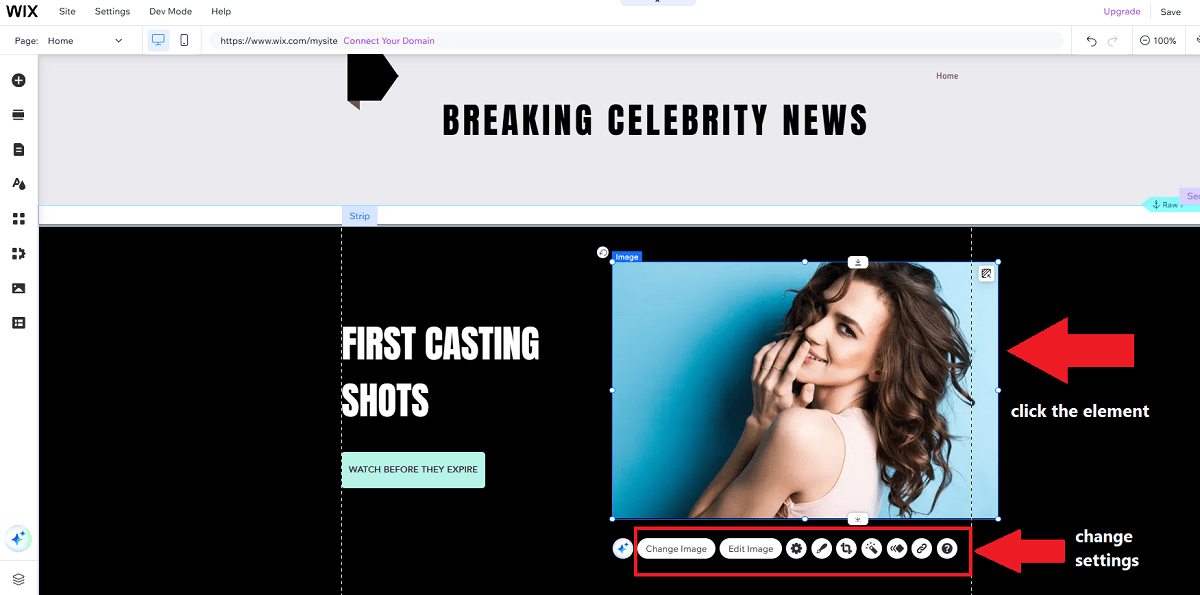
- Click on a template element and change its settings. You can replace template texts, images, backgrounds, and buttons.
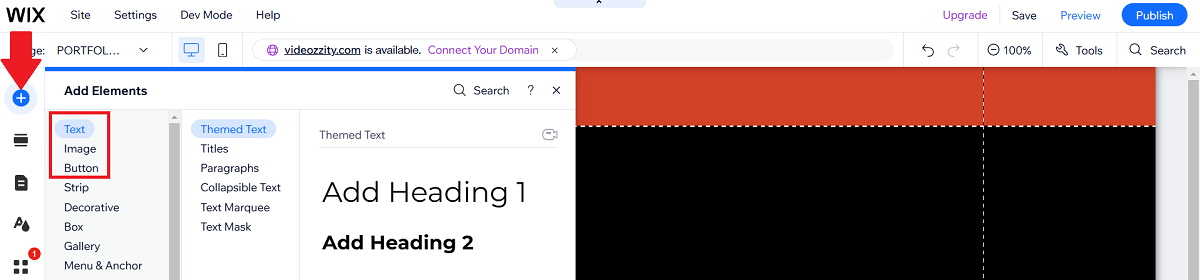
- Click the “+” icon from the left and add necessary elements like images, headlines, and buttons.
3. Add links
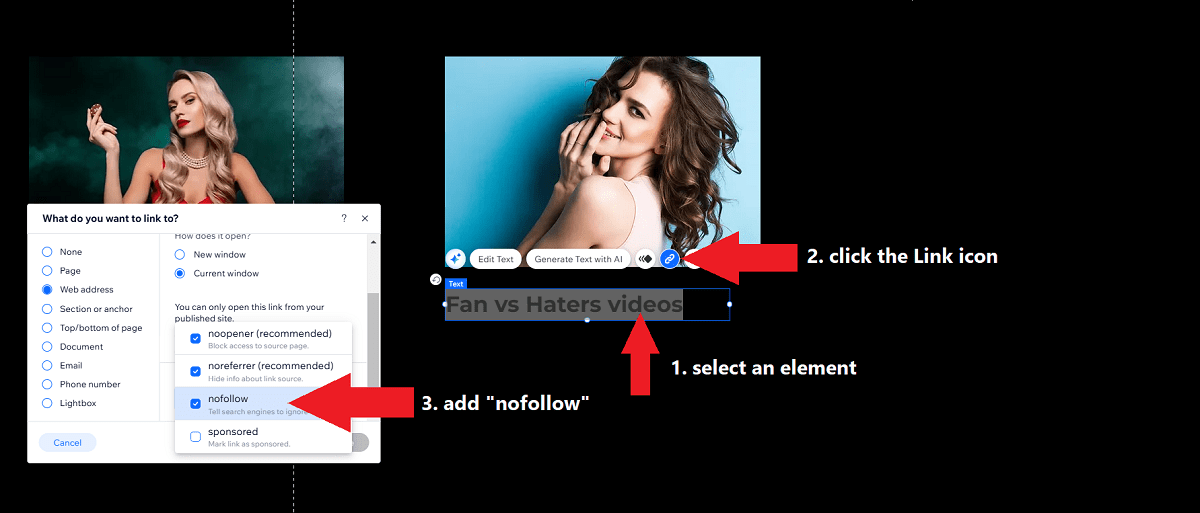
- Select a piece of text or click an image / button and place links: distribute Direct Links along with your main URLs
- Switch the “no-follow” attribute to your links by choosing Advanced SEO Settings
- You can also prevent all your web sources from crawling by choosing Settings → Site, domain & SEO → SEO Settings and turning off the toggle “Let search engines index your site.”
4. Customize design
- Use the drag-and-drop editor to adjust layouts and spacing.
- Open the mobile preview and move elements to fit the screens (Wix doesn’t provide responsive designs, but you can adjust layouts manually)
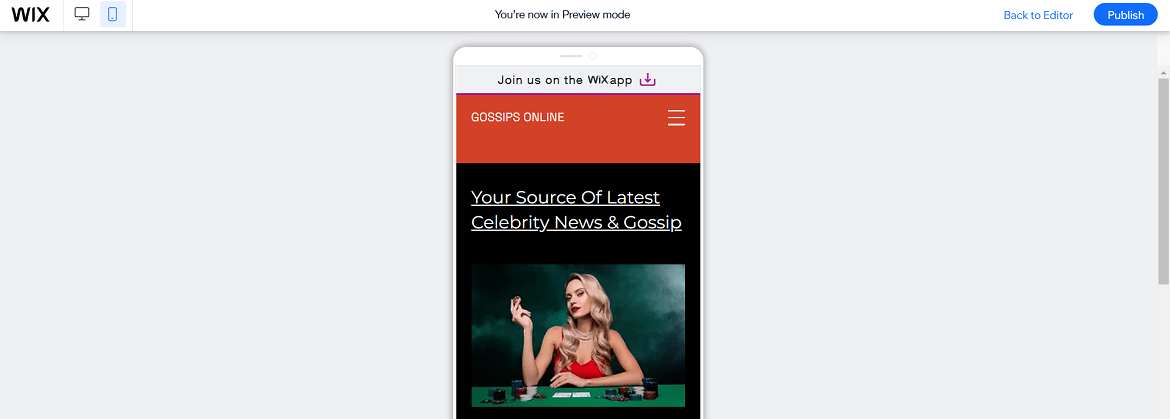
5. Preview and publish your Wix landing page
- Click Save to save all changes
- Hit the Preview link and check how the page looks on mobile devices. You can also switch to Mobile view from the Editor
- Click and follow all links added previously
- Select Publish with a Wix domain
- Test the live page for functionality and responsiveness.
Read also: Your full guide to Wix website monetization with various advertising formats: Banners, Popunders, Social Bar, etc.
Post-launch checklist
- Test functionality: Ensure all links, buttons, and forms work.
- Optimize for speed: Compress images and remove unnecessary elements.
- Preview on mobile: Test the page on multiple devices.
- Share & promote: Create a content plan for sharing your landing page on Facebook to engage people to come and check your content. Remember, you will only make money if people come to your lander, not the Facebook posts or stories.
Comparison: Wix vs. Google Sites vs. Blogger vs. WordPress
So which is best for developing a landing page without a website? This comparison table provides an actionable breakdown of the four platforms we observed above. Use it in case you haven’t decided on the best option yet.
| Feature | Wix | Google Sites | Blogger | WordPress |
|---|---|---|---|---|
| Ease of Access | Free plan available with Wix branding. Paid plans start at $16/month. | Completely free. Use it with your current Google account or create a new one. | Completely free. Use it with your current Google account or create a new one. | Free with WordPress.com (limited features). Self-hosted (WordPress.org) requires hosting (e.g., 3−3−10/month). |
| Ease of Use | Drag-and-drop editor makes it beginner-friendly but might seem cluttered | Simple and intuitive, but limited customization. | Easy to use, but outdated interface. | Easy to use if you only need a landing page; requires familiarity with plugins and themes. |
| User Experience (UX) | Trendy and polished; great for visual learners. | Basic and functional; ideal for quick, no-frills pages. | Outdated but straightforward; best for text-heavy pages. | Highly customizable; can seem complex for beginners. |
| Speed | Moderate; can be slow if too many elements are added. | Fast; hosted on Google’s servers. | Fast, lightweight, and simple. | Fast when used for landers. Big sites can also be very fast if optimized. |
| Purpose | Versatile; mostly used by freelancers, small businesses, and events | Best for simple, informational pages (e.g., local businesses) | Best for bloggers and text-based content; offer minimum tools for formatting. | Ideal for advanced users; suitable for blogs, businesses, and complex sites. |
| SEO Capabilities | Basic; built-in SEO tools, but limited flexibility. | Minimal; limited SEO options but nice discoverability. | Basic; relies on Google’s SEO but lacks advanced tools. | Great; supports plugins like Yoast SEO for advanced optimization. |
| Adding Images | Very easy; drag-and-drop editor with built-in image library. | Easy, straightforward image uploads. | Easy; simple image uploads but limited editing options. | Easy; supports media library and plugins for advanced editing. |
| Adding Buttons | Very easy; drag-and-drop buttons with customization options. | Easy; basic button functionality. | Moderate; requires HTML/CSS for advanced buttons. | Easy; built-in button elements and plugins to create advanced buttons. |
Which website builder is better for landing page creation?
- Best for beginners:
- Google Sites: Completely free and simple, but limited in features.
- Blogger: Also simple in usage, but a bit poor in tools. Blogger can’t create stand-alone pages, but you can limit the homepage to one post.
- Wix: Suitable if you need a versatile drag-and-drop builder, but the platform is quite heavy in usage with loads of micro actions required.
- Best for Bloggers:
- WordPress: Ideal for bloggers who want full control, scalability and advanced optimization for search engines.
- Blogger: Free and straightforward, but outdated.
- Best for advanced users:
- WordPress: Highly customizable with plugins and themes, but requires technical knowledge. It’s one of the best platforms to monetize content.
- WordPress: Highly customizable with plugins and themes, but requires technical knowledge. It’s one of the best platforms to monetize content.
- Best for speed:
- Google Sites: Fast and lightweight, hosted on Google’s servers.
- Blogger: Also fast, but limited in functionality.
- WordPress: quite fast if you don’t overload the page.
- Best for SEO:
- WordPress: Unmatched SEO capabilities with plugins like Jetpack, Yoast SEO, and Slim SEO.
- WordPress: Unmatched SEO capabilities with plugins like Jetpack, Yoast SEO, and Slim SEO.
- Best for visual appeal:
- Wix: Trendy templates and UX-friendly layouts make your landing pages visually appealing.
- WordPress: Highly customizable, but requires effort to achieve high-quality results.
- Best for monetization:
- WordPress: You can place the majority of ad formats here; the platform is compatible with Adsterra, Google AdSense and many other high-paying networks.
When to use each platform
| Platform | Best Use Case |
|---|---|
| Wix | Beginners, small businesses needing a visually appealing landing page quickly. |
| Google Sites | Quick, simple landing pages for promoting one product or for informational purposes. Mostly used to advertise local businesses like shops and cafés but works great for traffic monetization purposes. |
| Blogger | Publishers or affiliate marketers focusing on minimalistic pages but with a prospect to grow into a website or blog. |
| WordPress | Beginners or pros in search of a universal tool for SEO-friendly site building. |
Summing up:
Making a landing page without a website is much easier than you imagined. It all depends on the purpose: you don’t require in-depth optimization if you drive traffic from Facebook or other social networks. What you truly need is a nicely paying Direct Link. And you’re just one step away from getting it!
Landing page without a website: FAQs
What’s the difference between a landing page and a website?
The difference between a landing page and a website is in their purpose and complexity. Websites consist of multiple pages connected with inner links and dedicated to presenting a business in general or a set of topics with one idea: news, entertainment, artificial intelligence, sports, etc. Landing pages are far more specific: you make one to showcase one service or sell one product with one goal: make people buy it.
Do I need a domain for a landing page without a website?
Yes, all web resources, even those limited to a single page, require a domain. You may use a free domain offered by your platform (e.g., WordPress or Blogger) or refer to paid providers of domain names.
What are the main steps to create a landing page?
Here are must-have steps to create a landing page with no website.
Step 1: Define the purpose
Ensure you know the purpose or goal of the page. Examples: collect emails for newsletters, sell goods, sell online courses, get ad clicks.
Step 2: Decide how to make users convert
You defined the purpose of a lander, but how will you achieve this goal? Make a content draft: main benefits of the product, its differentiators, ways it solves users’ problems, proofs.
Step 3. Create main copy and design
Transform the draft into a story. Start with a clear offer
Step 4. Add CTA buttons
Ensure users can make a desired action easily. It’s better to include call-to-action buttons in the hero section (the first screen of the page), the main menu, and between important content blocks.
Make CTAs powerful and engaging. Instead of “Create account,” write “Join and earn.” All links and buttons must tell users exactly what to do next: SIGN UP, GET NOW, START A FREE TRIAL, etc.
Step 5. Design your landing page
– Build your landing page with blocks according to its purpose and the content. Add separators and spacers to make the page neat.
– Use high-quality images, but ensure to compress them to make your page load fast.
– Add illustrative images that prove your offer’s advantages, avoid placing dull pictures only for decoration.
Step 6. Test your page on desktop and mobile devices
Many website builders offer responsive design, but still, it’s important to recheck the functionality manually in various browsers.
Step 7. Publish the page and test the live version.
What’s the structure of a landing page?
Here’s the structure of an effective landing page:
Menu:
Make a sticky menu (a top bar or a hamburger) so users can navigate any page section easily. Add a CTA button to the menu.
Hero section:
– The hero section is the first area users see right after opening a page. It’s placed under the menu/header.
– Add an offer (e.g., “Get Free Videos,” “Exclusive photos,” “Best APKs for Android”).
– Include buttons or noticeable links
– Insert a button with a call to action or CTA (e.g., “Sign Up Now,” “Download,” “Get Now”) depending on what users need to do.
Lead form
One of the landing pages’ purposes is lead generation: registrations, subscriptions, pre-orders.
– Make a brief description outlining the purpose of the form
– Keep your form short: add only necessary fields
– Make every step clear to the user
– Keep the right format: texts, emails, numbers
– Add contrast and visible buttons
– Add a message for successful form submission
– Create an error message
– Test the form from various devices
Benefits:
– Use bullet points or icons to highlight key benefits.
– Add icons to make the info neat and visually appealing.
Testimonials/Proofs:
– Include a section for customer testimonials or trust badges (if available).
– Add proofs (payments, product reviews, awards)
FAQs section:
– Include answers to the most asked questions to remove doubt and help users convert faster.