If you’re here, you probably know what postback is and how important it is for the success of affiliate marketing campaigns. In this post, you will dive into a postback setup practice. We will connect an ad network (Adsterra) with a tracker (Voluum) and pick an offer from Voluum. Let’s get down to it!
Postback setup practice #1: Generating postback URLs in your traffic source
Supposing, you are going to buy traffic from Adsterra and send it to an affiliate offer. You will need to follow the next steps:
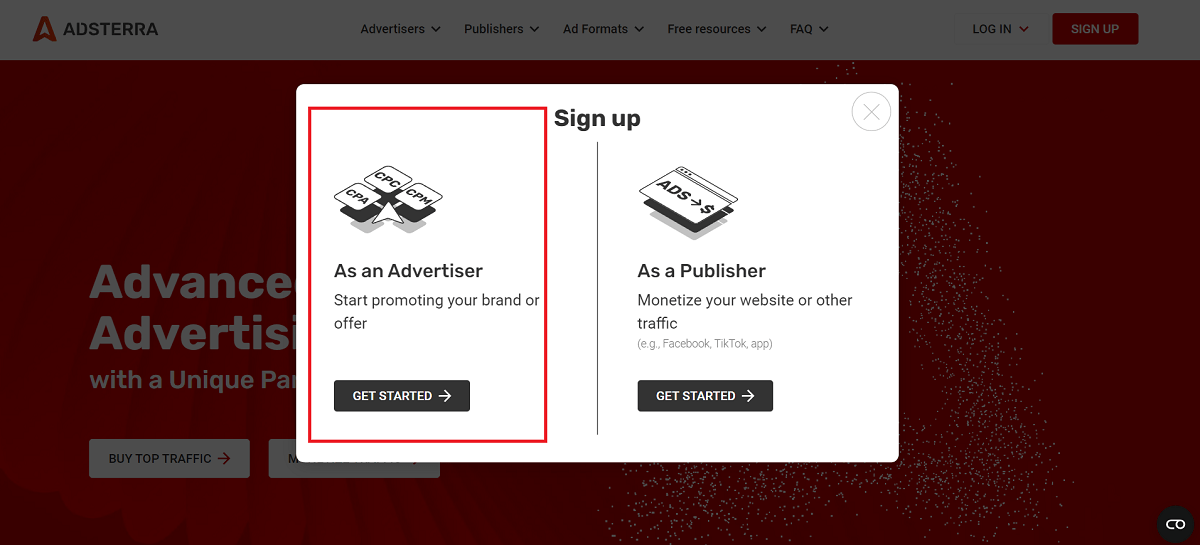
Step 1. Register as an advertiser on the Adsterra platform
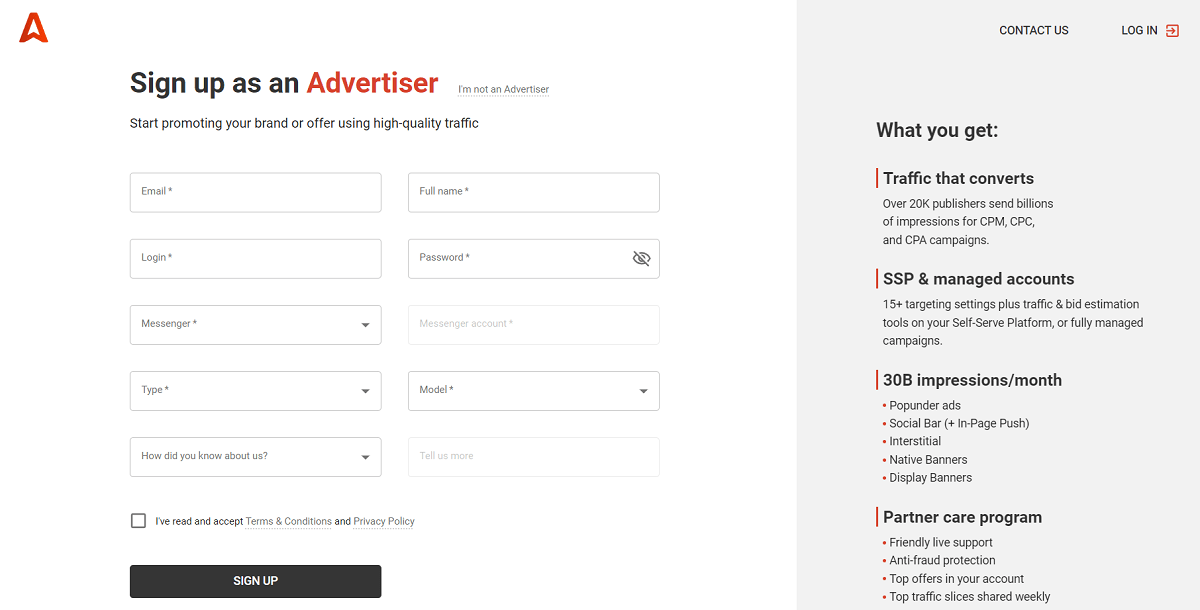
Fill in the registration form and remember to check the inbox to click the link in the confirmation email.
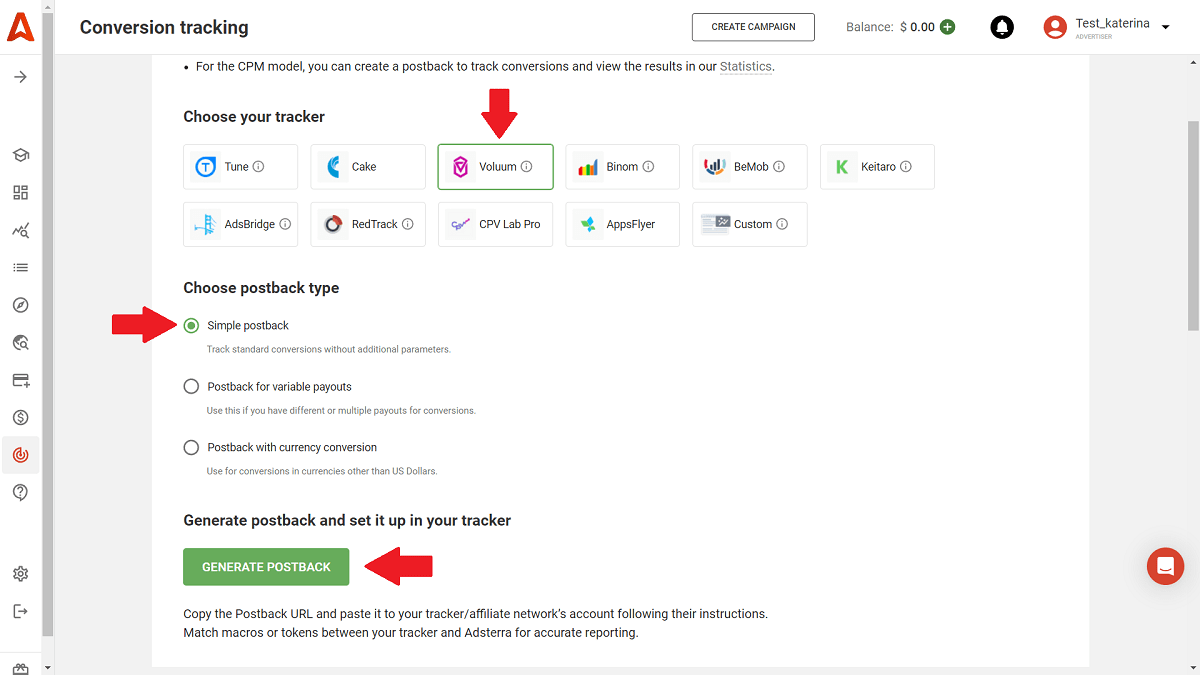
Step 2. Navigate to the Tracking tab and then click Conversion Tracking
Let’s assume you’re using Voluum as a tracking system. Choose Voluum from the trackers’ list and select the postback type. Here, we’ve picked a simple one. You can find more details about S2S tracking and postbacks in our blog. Click the GENERATE POSTBACK button.
http://www.pbterra.com/name/CHANGENAME/at?subid_short={externalid}Here above, CHANGENAME is your unique username on Adsterra; it will be automatically added to the URL.
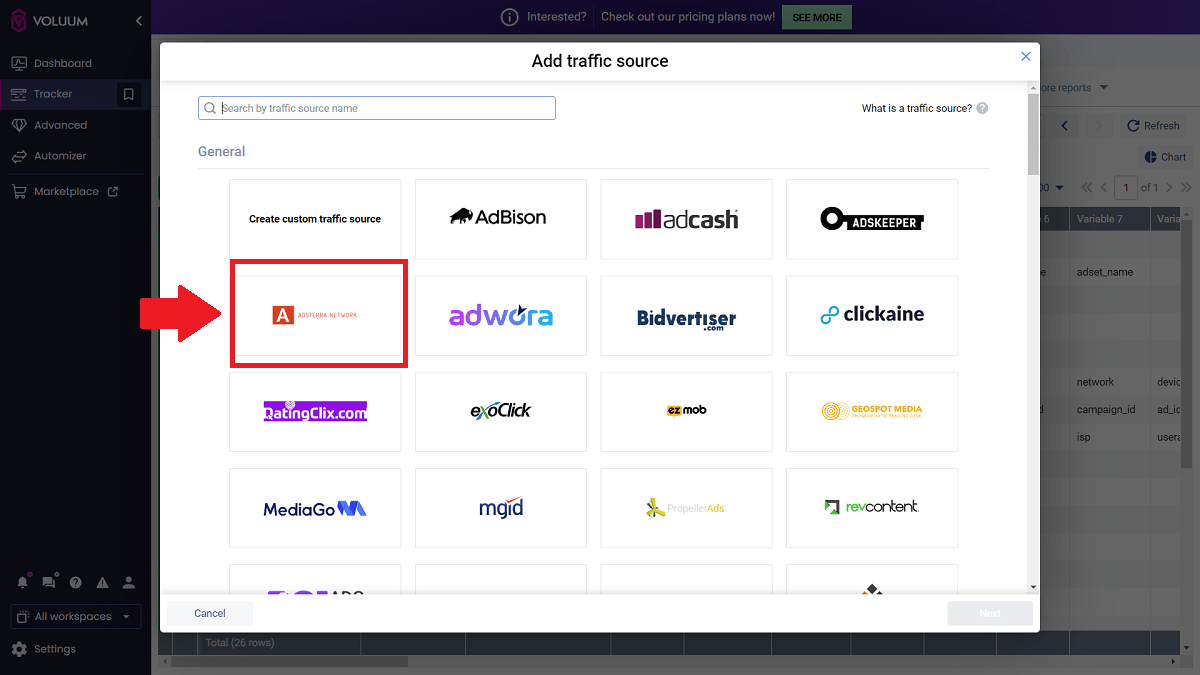
On Voluum, open the Traffic Sources tab and hit Create.

Choose Adsterra from the panel of ready-made integrations and hit Next.
Step 4. Paste the postback from Adsterra
Scroll down to the section Passing Conversion Info to Traffic Source and paste the postback URL you generated on Adsterra. Since you paste the copied URL, you won’t have to replace the CHANGENAME with your username from Adsterra—you already have it in the URL!
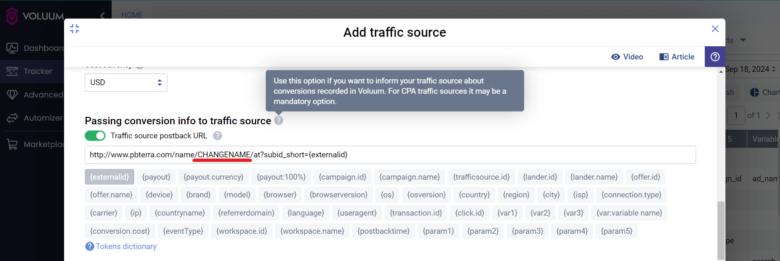
This way, you will allow Vollum to deliver information about conversion to the traffic source (Adsterra). Adsterra will be able to recognize which user, from those who initially clicked on the ad, converted if this URL contains a unique click ID generated by the source.
Step 5. Create a campaign on Voluum
Go to the Campaigns tab, click Create, and select the Campaign Simple type.

Now select Adsterra in the Traffic Source field and type in a name for your further campaign.
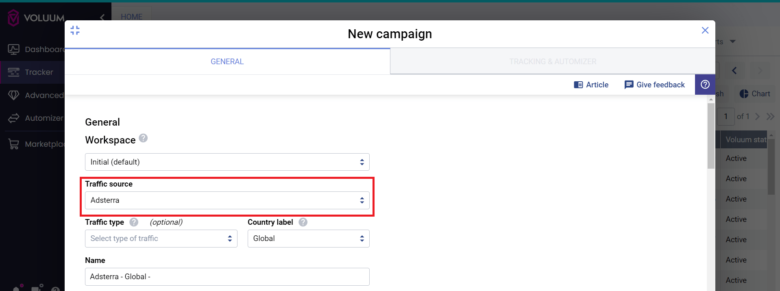

Change Path Destination to Offers Only.

Scroll down to the Offers section and hit the dropdown list. You can now find an offer you previously added to Voluum. Pick this offer and click Save.

Step 6. Paste the URL taken from Voluum to Adsterra
Now, go back to your Adsterra account and hit the Conversion tracking page again. Scroll down to the Check URL section and paste the URL in the field. Ensure to include the required parameter ##SUB_ID_SHORT(action)## to track conversions.
Click CHECK URL.

Step 7. Make a test conversion
After checking the URL, click the MAKE A TEST CONVERSION button and complete the conversion as if you were a user. This will help ensure that all settings are correct and everything works properly.

More about postback setup
Tracking is king when you’re determined to optimize bids without overspending. Adsterra offers you easy-to-run integrations with:
- Voluum
- Keitaro
- BeMob
- Binom
- AdsBridge
- RedTrack
- Tune
- Cake
- Keitaro
- RedTrack
- CPV Lab Pro
- AppsFlyer
Take a closer look at this set of articles about ad optimization, where we share tips for getting more traffic, setting up pricing tokens, selecting traffic sources, and much more.
