WordPress is the ideal website platform for developing your online business and earning revenue from incoming traffic due to ads and sales. It offers many customization options, gives you full control over every aspect of your website, and is mostly free! (Essential plugins and good WP themes may cost some money, but it’s always worth it.
So if you’re a publisher looking to migrate from other website building platforms like Wix or Squarespace, or you’re a newbie looking to jump on the booming website monetization trend, we’ve got you covered. In this article, you’ll learn how to install WordPress in several simple steps.
WordPress.com or WordPress.org
WordPress.com and WordPress.org are different platforms; WordPress.org is 100% free (open-source website software) and has to be set up with a hosting provider, while WordPress.com is an all-in-one platform that creates your website in a few clicks.
WordPress.com offers both free and premium versions, and you don’t need any external hosting; the free version has limitations. WordPress.com is preferable for potential website owners that don’t want the stress and lack web development skills, while WordPress.org is preferable for website owners who want to control everything.
Installing WordPress on a hosting provider
A website is hosted when a web hosting company allocates space on a web server for a website’s files. Web hosting makes a website’s files (code, images, etc.) available online. Every website you visit is on a server.
The amount of server space allocated to a website depends on the hosting. Shared, dedicated, VPS, and reseller hosting are the most common types. They often differ in terms of server technology, management, and additional services. Here’s a comprehensive guide on choosing web hosting.
What is a server? A server is a computer that connects users from all over the world to your website. Web hosting companies provide servers, connectivity, and related services to host websites. They cover a wide range of hosting needs, from small blogs to large corporations.
Bluehost
Bluehost is one of the world’s leading hosting businesses and an officially approved WordPress hosting provider. First, choose a domain name for your new website or blog and buy it.
Go to Bluehost’s home page and click “Get Started,” and select a domain name. If you have a domain name, you can enter it here and then get your DNS pointed to Bluehost.
Once you’ve entered a domain name, fill in your personal information. Choose which hosting package you want.
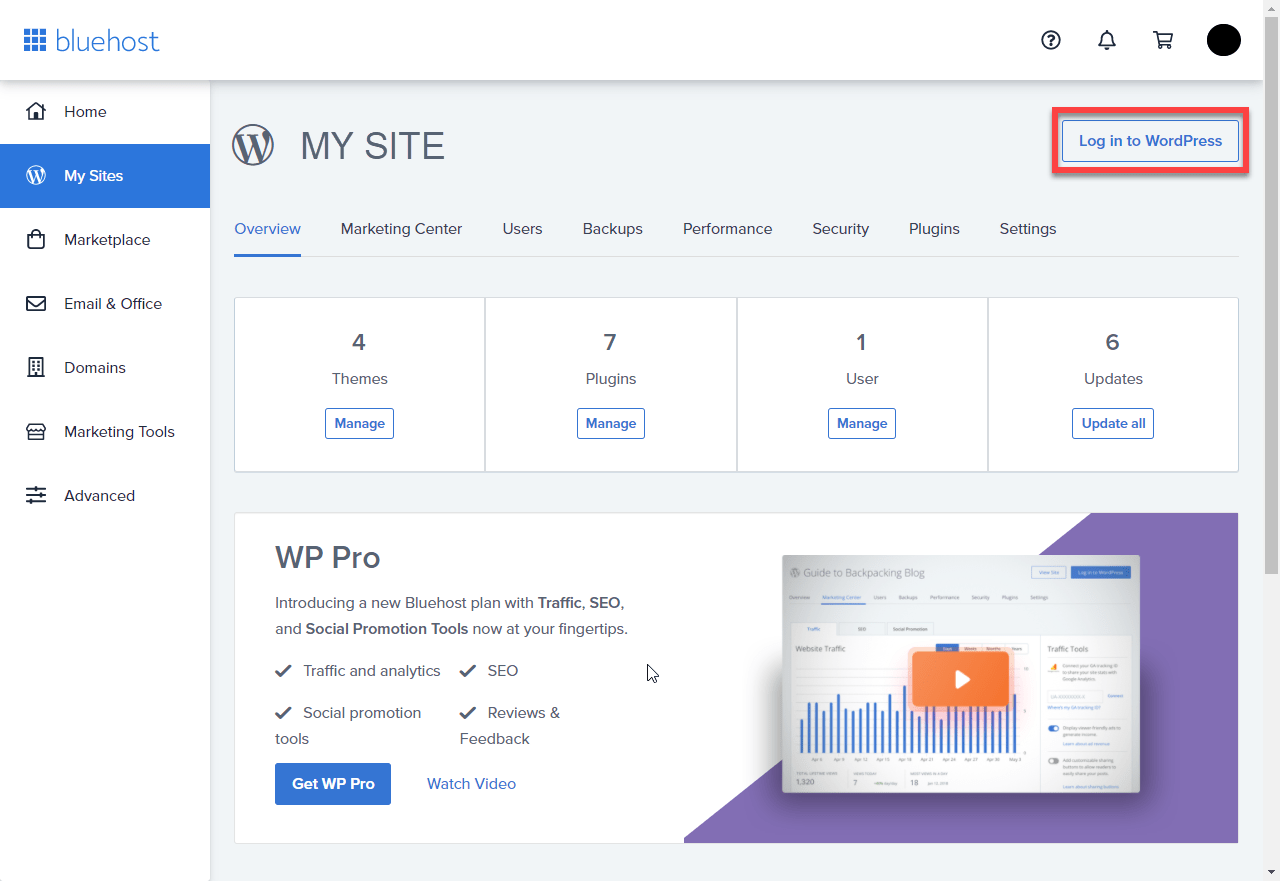
- To access the admin area of your new site, click Login to WordPress.
- Go to your cPanel, and scroll to the MOJO Marketplace section.
- Click “One-Click Installs.” This opens the Scripts and Platforms page in MOJO Marketplace.
- Go to the blog section at the top and click on the WordPress icon. This opens the installation window.
- Click Start to begin the WordPress installation process.
- Select where you want to install WordPress: any domain, a subdomain, or a folder for one of your domains.
- Click Check Domain to ensure the domain is assigned and pointing to your account. If you get a warning about overwriting files, just check the box and continue.
- Show Advanced Options. Set your WordPress username and password in this section. It is advised to use a username other than “admin” and a strong password. To use an existing database, uncheck the “Automatically create a new database for this installation” box.
- Read the terms and conditions and check the box. Then click “Install Now.”
- WordPress will provide you with your site URL, admin login URL, username, and password once fully installed. Except for your password, you’ll get a copy in your email. Keep it safe.
- You can now access your WordPress site via the admin login URL. Click “Log In” with your username and password. This opens your WordPress dashboard.
HostGator
Just like Bluehost, HostGator is a popular beginner shared WordPress. They also make WordPress installation a snap with just a few clicks.
- To begin, log in to your HostGator hosting account’s dashboard, then navigate to the ‘Software‘ section and click the ‘QuickInstall’ icon.
- Launch the WordPress installer wizard by clicking ‘WordPress‘ on the next screen. Enter a directory path to install the WordPress and the domain name. Most beginners want to install WordPress in the domain’s root (for example, wpbeginner.com). In that case, leave the directory field blank.
- Continue by clicking the ‘next‘ button. The installer will now prompt you to enter the details; site title, admin username, first and last name, and an admin email address for your WordPress site. (Ensure you have access to that email address because you’ll receive your WordPress password mail from the email account).
- Click the ‘Install‘ button to continue after filling in all the information.
- The installer begins background WordPress installation for you. After installing, you’ll receive a success message that contains your admin username and password.
You can now access the WordPress admin area by clicking the ‘Login‘ button. Congratulations on completing the WordPress installation process on your HostGator account.
SiteGround
All SiteGround plans include a quick and easy WordPress install. From your hosting dashboard, you can install WordPress. We’ll show you how to install WordPress on SiteGround using two different methods. You can select the one that best suits your needs.
Installing WordPress on SiteGround as a new user
If you’re new to SiteGround, you’ll see a welcome popup when you first log in. It asks if you want to start building your website right away.
- Select ‘Create a new website‘ and then WordPress from the drop-down menu. The installer wizard will ask for WordPress installation information. Provide an email address, admin username, and a password for your new WordPress site, then click the ‘Confirm’ button to proceed.
- On the next screen, click the ‘complete setup’ button for the installer to begin WordPress installation if the details are correct. Additional website enhancements are available, but we’ll skip them for now; you can add them later if necessary.
- After installation, you’ll receive a success message. Click ‘proceed’ to the customer area; you can find your new website under the ‘My Accounts’ tab.
- To access the WordPress admin area, click ‘Visit admin panel.’
Congratulations! your WordPress installation on your new SiteGround account is successful.
Installing WordPress on SiteGround as existing customer
Installing WordPress from your SiteGround hosting account is extremely simple.
- To access the cPanel dashboard, log in to your hosting account. Scroll down to the ‘Auto Installers‘ section and select WordPress, choose a website protocol (HTTP or HTTPS) and a domain name, then click ‘Install.’
- Input your site title, admin username, password, and email address. Check the WordPress Starter option because it will guide you through the post-installation steps for setting up your site.
- Proceed by clicking the ‘Install’ button to start background WordPress installation, and when done, you’ll receive a success message and a link to the admin section of your WordPress site.
- Launch the site setup wizard by clicking on the admin area link to guide you through the WordPress installation process.
- Click Start Now to continue.
- Select a theme for your WordPress site. Remember that each theme has customization options; therefore, we recommend picking a simple design template resembling your vision.
- Select other features for your website such as calendar, shop (an online store), or JetPack. Click Next.
- Click Finish to begin the installation. You’ll receive a success message on your screen containing a link to your WordPress dashboard.
The WordPress admin dashboard consists of custom shortcuts for creating content, customization, and a beginners’ guide for your website. WordPress installation on your SiteGround hosting account is now complete.
WP Engine
WP Engine manages your WordPress site updates, installation, and performance optimization. As a managed WordPress hosting provider, WP Engine installs WordPress for you automatically when you sign up. You can also create new websites depending on your hosting plan.
- Go to the ‘Sites’ page in your WP Engine dashboard. A list of all of your WordPress sites will appear.
- To add a new WordPress website, click the ‘Create Site‘ button.
- On the next screen, provide a name for the production environment. Enter a name for your website and click Create Environment.
WP Engine begins installing your WordPress environment. DNS changes will take a while to take effect.
- By clicking the link in the sidebar, you can access the WordPress admin area. On the same page, you’ll also see your login credentials.
- Click ‘Add domain‘ to add a domain to your website and point the Domain’s DNS settings to WP Engine. WP Engine isn’t a domain registrar, so you’ll need your site’s IP address and CNAME to perform this action.
- You can find this information on your site’s overview page. We’ll now show you how to use Domain.com to enter this information. All domain registrars have the same basic settings; you need to find the DNS settings.
- To change your domain name’s DNS and Nameserver settings, go to your Domain.com account dashboard and click ‘DNS and Nameserver‘ Settings.
- Change the “A record’s name” to the @ sign on the next screen and click Edit to save changes.
- Then, enter the WP’s Engine IP address and click on the ‘Update DNS‘ button.
- The next step is to check if you have a CNAME record with the name www. If you do, you’ll need to make changes to the CNAME record. Otherwise, select ‘Add DNS Record‘ to continue.
- Type the WP Engine’s CNAME subdomain in the Value field, and click the Add DNS button. That’s it; your domain name is successfully pointing to your WP Engine-hosted WordPress site.
Installing WordPress from cPanel
Many web hosting companies use cPanel. It provides a simple web-based interface for website owners through which they can manage their hosting accounts. It consists of various useful tools, including auto-installer scripts that make WordPress set up an easy process.
Hosting companies use various auto-installer scripts, the most popular options are Softaculous, QuickInstall, and Fantastico.
We’ll show you how to use all three auto-installers to install WordPress. Depending on the installer available on your cPanel dashboard, you can follow the instructions.
Softaculous
- Log into your cPanel account and search for the Softaculous or WordPress installer icon. You can find them in the Auto Installers section.
- Launch the Softaculous WordPress auto-installer by clicking any of these icons. You’ll see an overview of WordPress, then proceed by selecting the install tab. Softaculous will now prompt you to choose a location for your WordPress installation.
- If your website has a secure connection with SSL and HTTPS, you can use HTTPS:// or https://www as the protocol. Else, use HTTP:// or http://www.
- After that, select the domain name to install WordPress. Some users prefer to install WordPress in the root directory of their domain. In such cases, leave the ‘In Directory’ field empty.
- You’ll see the site settings section by scrolling down a bit. You need to provide a title and description for your WordPress site.
- Next, select an admin username, password, and email address. Softaculous will fill in the username and password fields for you automatically. It will use a strong password and a non-dictionary word as the username.
In the admin email field, double-check that the email address is correct. If you forget your password, WordPress will send you a notification and a link to reset it here. - The remaining options on the screen are all optional. Start the installer by clicking the install button. Installation takes a few moments. Close the window only when the progress bar reaches 100%; otherwise, your WordPress installation may be incomplete. After the installation is complete, you’ll see a success message providing you with links to your website and the WordPress admin area.
QuickInstall
- Login to your hosting account’s cPanel dashboard and click on the QuickInstall icon at the software section that will direct you to the 1-Click installer page on QuickInstall.
- Click on WordPress to launch the WordPress installer.
- Choose a domain name. Most beginners want to install WordPress on the root of their website. In that case, leave the directory field empty.
- To continue, click the next button. The installer now prompts you for information such as your WordPress username, email address, and site title.
- After filling out all the fields, click the install button.
- Click the Install button after you’ve finished filling out all of the fields. Following that, you’ll see a success message with your login information, including your username and password.
- You can now enter the WordPress admin area by clicking the ‘Login‘ button.
Fantastico
Fantastico is a WordPress auto-installer script. It works similarly to the other installer scripts and allows you to install WordPress more quickly.
- First, log in to your cPanel dashboard and scroll down to the software and services section to find the Fantastico icon.
- Launch the auto-installer script by clicking on the Fantastico icon. Don’t bother if Fantastico looks different on your host. The basic installation steps are the same, and you should be able to follow them without difficulty.
- On the left side of the main Fantastico screen, you’ll find a list of web applications. Navigate to Blogs to find WordPress. To continue, simply click Click here to install WordPress. Fantastico’s WordPress auto-installer prompts you to complete your installation settings.
- To begin, select the domain on which you want to install WordPress. If you’re going to install WordPress in a subdirectory, fill in the field with the subdirectory’s name. Otherwise, leave the field empty.
- Provide the admin user account information under the ‘Administrator Details‘ section. Create a username, password, and email address for your WordPress admin account.
- After Clicking Submit, Fantastico then sets up WordPress, and you receive a success message.
Installing WordPress via FTP
- The first step is to download the most recent version of WordPress. Download the most current version of WordPress, which comes in a Zip file format.
- Unzip the file to find the WordPress folder containing all the files you’ll need to upload to your web server.
- Connect the FTP client to your web hosting server. After establishing a connection, use the FTP client to transfer your WordPress files to your website’s server.
- If you want to install WordPress on your primary domain name (like example.com), upload your WordPress files to your website’s root directory: /public_html/.
- Place the WordPress files in the /public_html/blog folder if you want to install WordPress in a subfolder.
- After uploading, create a database in your hosting cPanel.
We’ll show you how to do it with cPanel. If your hosting company uses a different control panel, look for MySQL databases. The remaining settings will be very similar.
- Navigate to MySQL user sections on your cPanel account, fill in your MySQL username and password to grant user access to the database. Click the ‘Create a user’ button to continue.
- Scroll down to the ‘Add User to a Database’ section in your cPanel to add a user to the database. Select the user and database and click the ‘Add’ button.
- After upload, go to the URL in your browser, depending on the file’s directory. Select your language preference on the language selection page and click the ‘Continue’ button to proceed.
- Fill in your database name, password, and MySQL host information correctly and click Submit. After establishing a connection with your database, WordPress will display a successful message.
Take a note of the database’s name, MySQL username, and password after the MySQL database and user setup because it’s important.
Things to do after installing WordPress
1. Choose a language
You can use WordPress in any language, including English, Spanish, and others. Select a language during the WordPress installation process or change it later by going to the WordPress General page in the Admin settings.
2. Choose a theme
Themes are in charge of the visual appearance of your WordPress-powered website. There are tens of thousands of WordPress themes to choose from. With so many options, it can be confusing for beginners. Therefore, here’s our guide for you in choosing a theme for your site.
3. Installing and using WP plugins
WordPress has a vast collection of plugins available for usage, allowing you to extend functionality and add new features. There are more than 58,000 free plugins available in the WordPress plugin directory alone. If you’re not sure which plugins to install, check out our list of the most important WordPress plugins for all websites.
Conclusion
WordPress is a large platform with a lot of tools to help users create and manage their websites. Due to its increasing popularity, a growing number of users are attempting to turn their WordPress website into a source of income (and since you’re reading this, you’re probably one of them).
Fortunately, WordPress is a great content management system (CMS) for creating a profitable eCommerce website. However, it’s primarily a blogging platform, so you’ll need to find plugins or solutions to help you monetize it.
We understand that monetization is crucial for many website owners. And we encourage you to use various methods to monetize the time and effort you put into your website. We’ve written a special article to help you make money from your website.