
Campaign targeting settings save thousands of dollars while making your offers reach the most motivated users. However, with 20 traffic segmentation options, one can easily get confused or spend too much time testing them one by one. We decided to save you time and asked our expert, Sasha, to create an exhaustive guide to Adsterra targeting settings.
Previously, Sasha broke down the sorest topics of a campaign setup. Today, we move further and dive deeper into audience segmentation.

Head of CPA
Welcome back to the series of skill-boosting guides to Adsterra features. Our topic is ad targeting, and we are going to cover all additional settings that can help you reach the right users with the right offers in the right place with the best possible result. We’ll be using Adsterra Self-Serve Platform, so, fasten up, sign up and let’s go!
General campaign targeting settings
Our topic today is creating excellently targeted campaigns or managing additional traffic filters. However, when you set up a campaign on the Adsterra Self-Serve Platform, you start with the required (or general) targeting settings. Let’s revise them now.
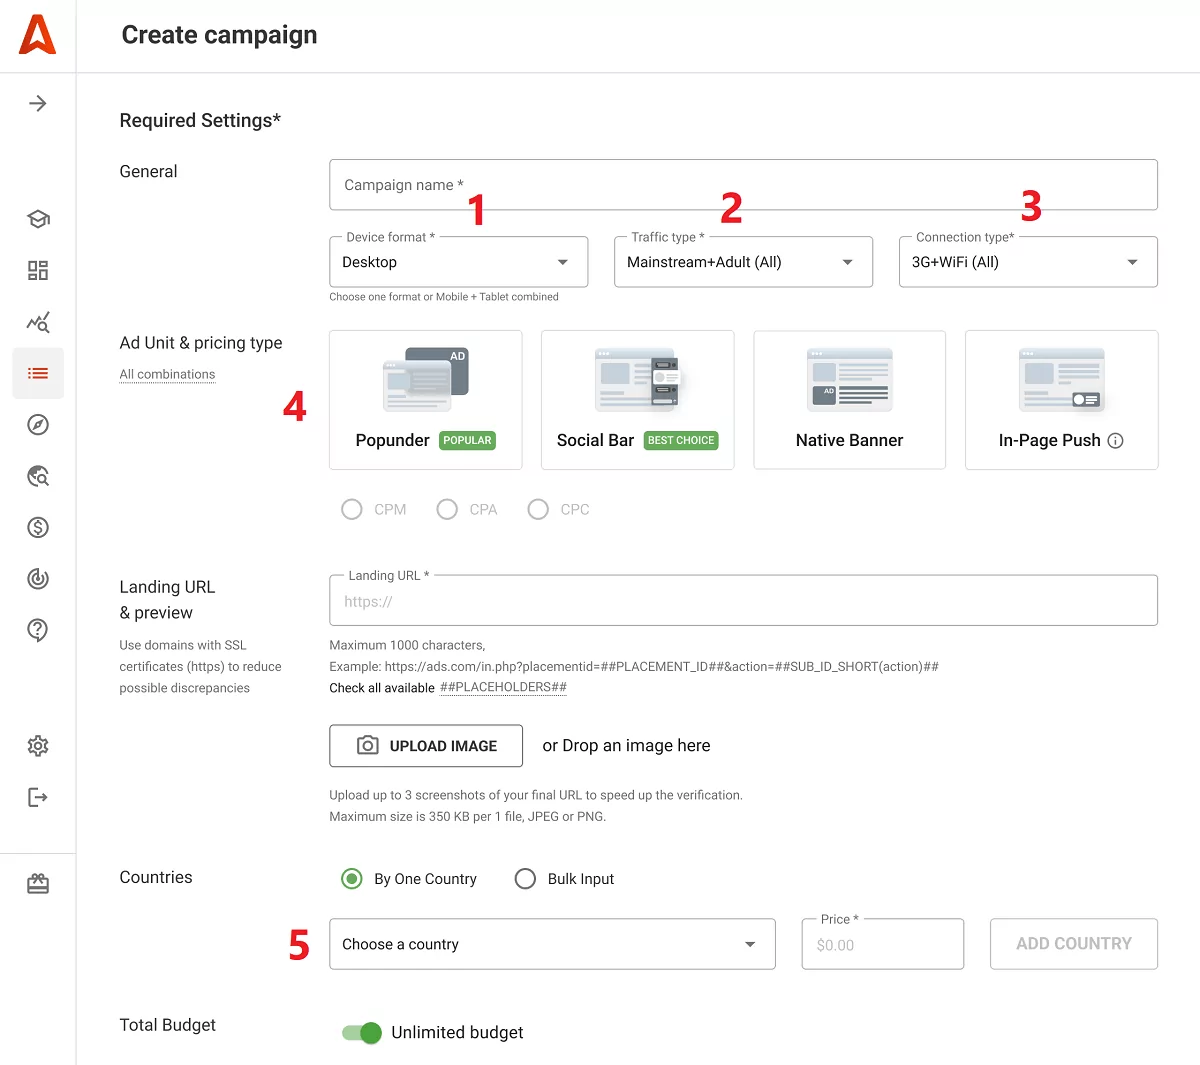
Device format
Device format targeting means choosing between desktop and mobile traffic. Adsterra’s 35K+ publishers send all types of web impressions, but to target all device types, you will need to create (or copy) two campaigns. It’s crucial for correct campaign monitoring and optimization in the future since desktop and mobile traffic behavior differs drastically.
Mobile traffic includes tablets, but you can remove them from your campaign by removing the tick.
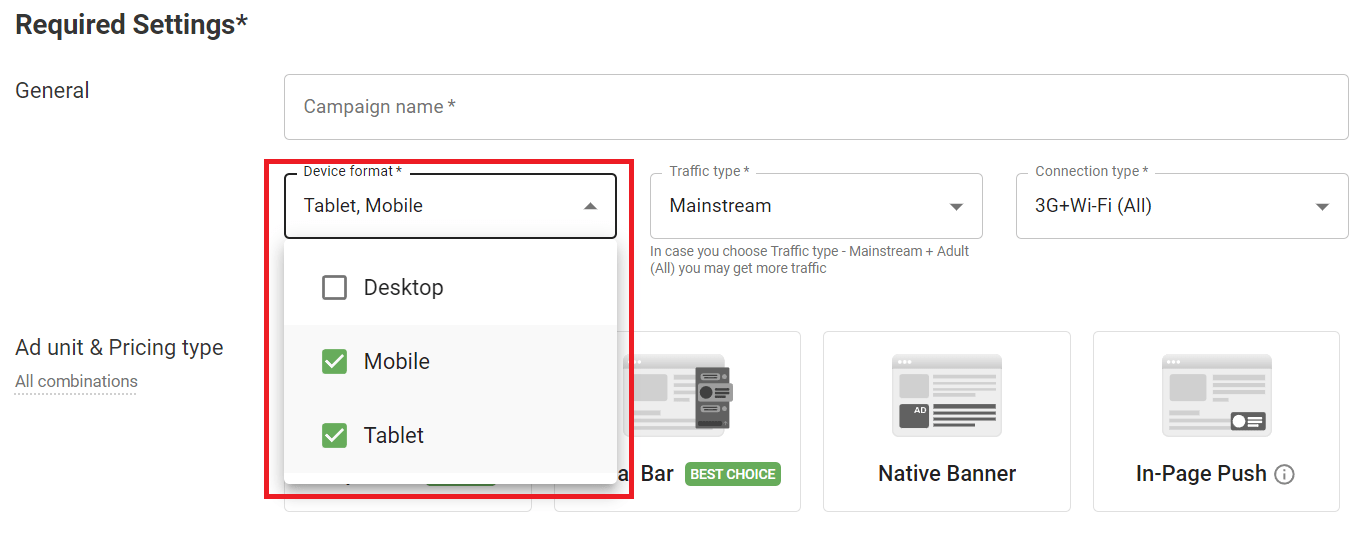
The Device type setting is vital for further traffic segmentation by operation system or browser version. We’ll discuss them a bit later.
Traffic type
Another vital step is choosing the type of traffic. This is nothing but your main audience profile paired with the website’s specifics. Mainstream traffic is best for general offers like E-commerce, Mobile Apps, and Software. The non-mainstream type is more suitable for specific offers like Dating or iGaming. I recommend you start with both types if your policy allows you to advertise on niche websites.
Broader targets reveal more opportunities for conversions. Adding alternative traffic types may be very beneficial; we laid out all the nuts and bolts in the previous guide to Advertising Campaign Scaling.
Connection type
The Connection type setting is vital when you target subscribers of a particular mobile carrier (e.g., T-Mobile in Austria). It helps remove Wi-Fi connections, focusing your spending on 3G and 4G users. On the other hand, if you pick only Wi-Fi, you won’t be able to choose mobile carriers.
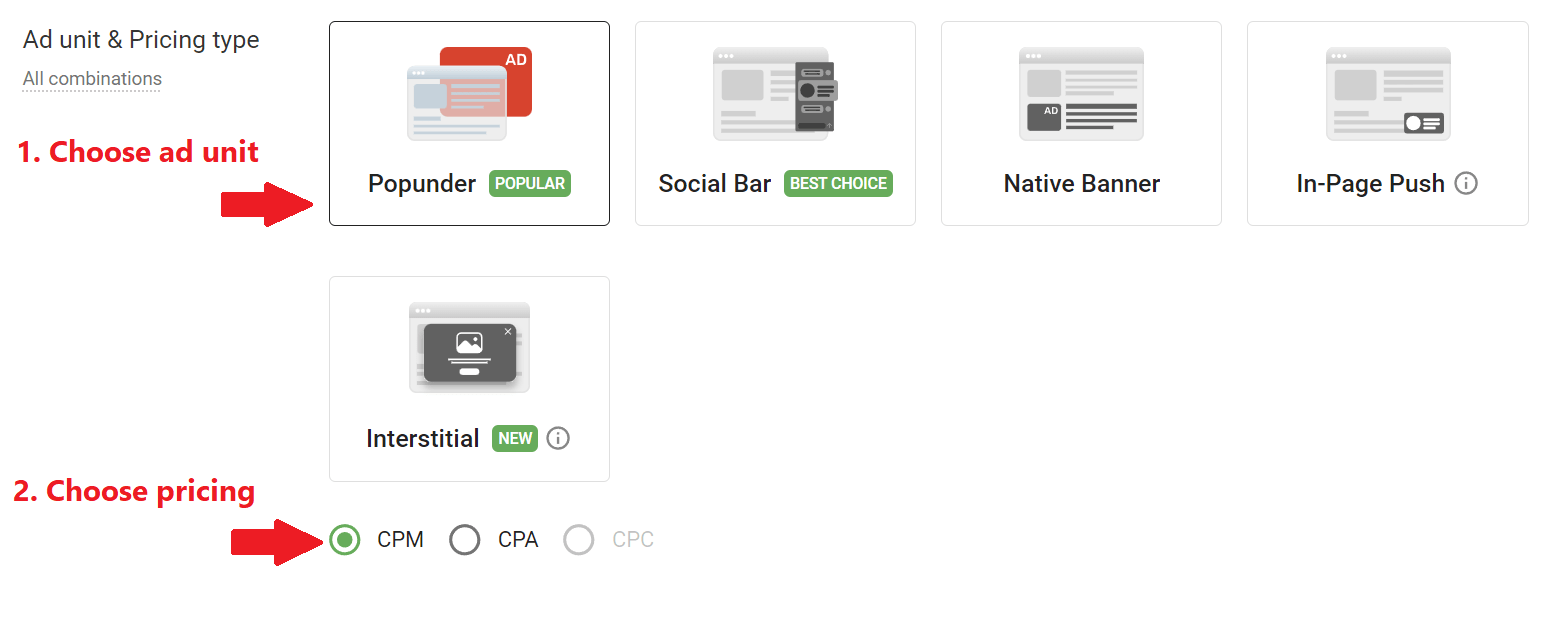
Ad Unit & Pricing type
Every marketing campaign requires an advertising format. While it’s not a targeting setting genuinely, you do nothing but filter traffic by the type of advertising codes placed on publishers’ websites or other platforms. When you launch, say, a Popunder campaign, you choose publishers who have put pop ads codes on their websites, and so on. Pricing types — CPM, CPC, or CPA — also depend on ad units.
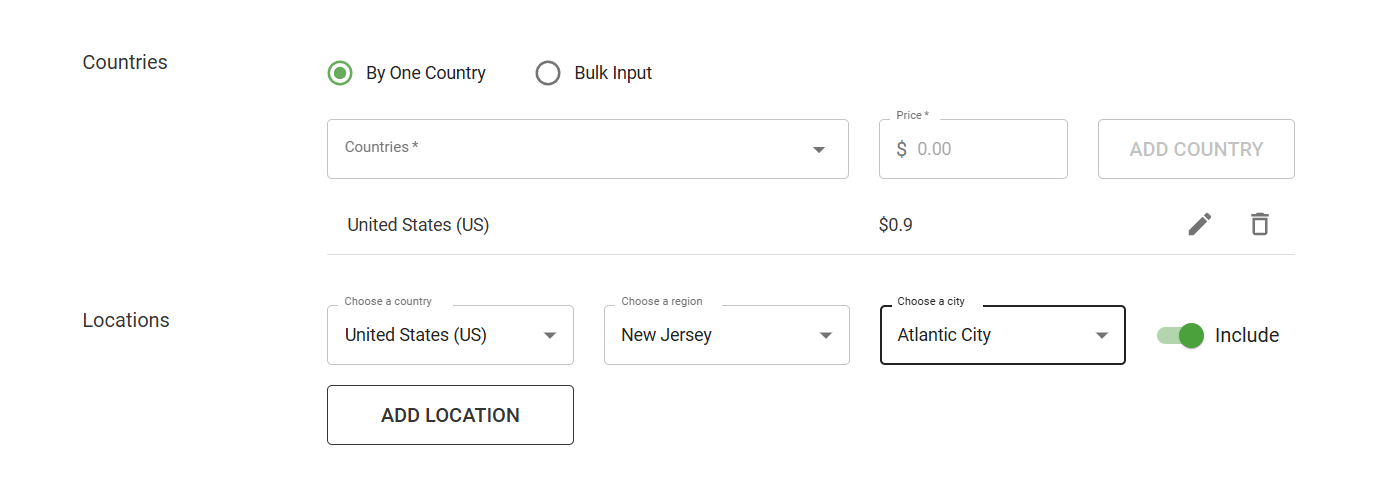
Country
Even a global-scale campaign won’t run without geo targeting. This setting also defines your bidding strategy.
With Adsterra, you can either select countries individually or use bulk input. I always recommend splitting your campaigns by country since it simplifies controlling the rates and traffic behavior.
If you need to focus on specific areas of the country, use location targeting. Adsterra allows for specifying regions and even cities to focus on a desired audience. It’s especially critical when you run an iGaming or Sports offer within a country with regulations that vary from state to state.
And we’ve done with a brief outline of the required campaign targeting settings. They’re enough for the first tests, but your true craft comes with additional targeting. So let’s carry on with these extras that can supercharge your campaign.
Additional campaign targeting settings to filter traffic
Additional campaign targeting settings allow for reaching out to the best-matching audiences. In other words, you cherry-pick those audiences that bring more clicks and conversions while removing traffic slices with poor performance.
Through the Self-Serve Platform, you can specify:
- Operating system
- Browser
- Language
- Day of week
- Time range
- Carrier
Our next step is to clarify these options one by one.
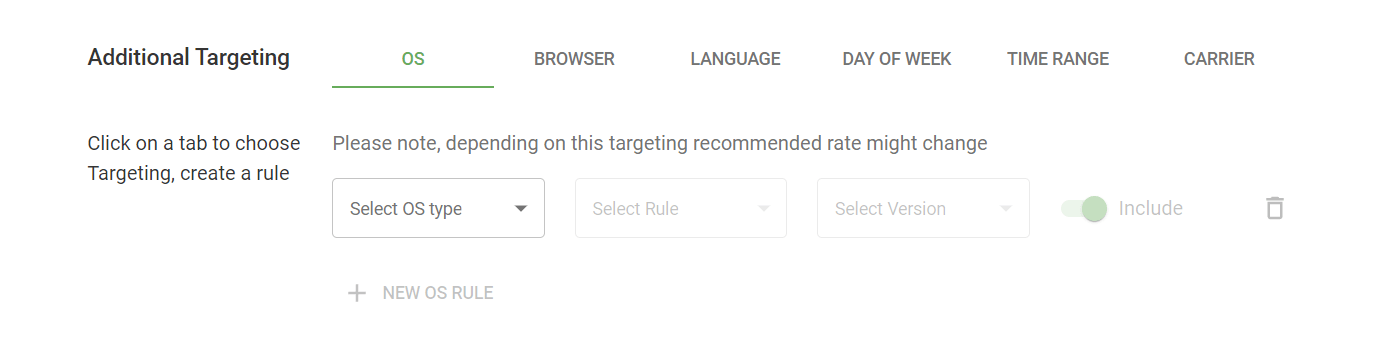
OS targeting
The OS setting is more than evident. You select users who have a specific operating system installed. When will you need to do so? It depends on the type of the offer you run. The OS targeting is an absolute MUST when you promote a Software or Utility offer, as these products are typically built for a specific OS.
What else? A wise move is to split your mobile iGaming, E-commerce, or Finance campaigns by OS, at least into iOS and Android segments.
iOS and Android users sometimes demonstrate different behavior patterns, and monitoring them separately will make your life easier, believe me.
Note
Remember that OS targeting options depend on the Device type you selected previously.
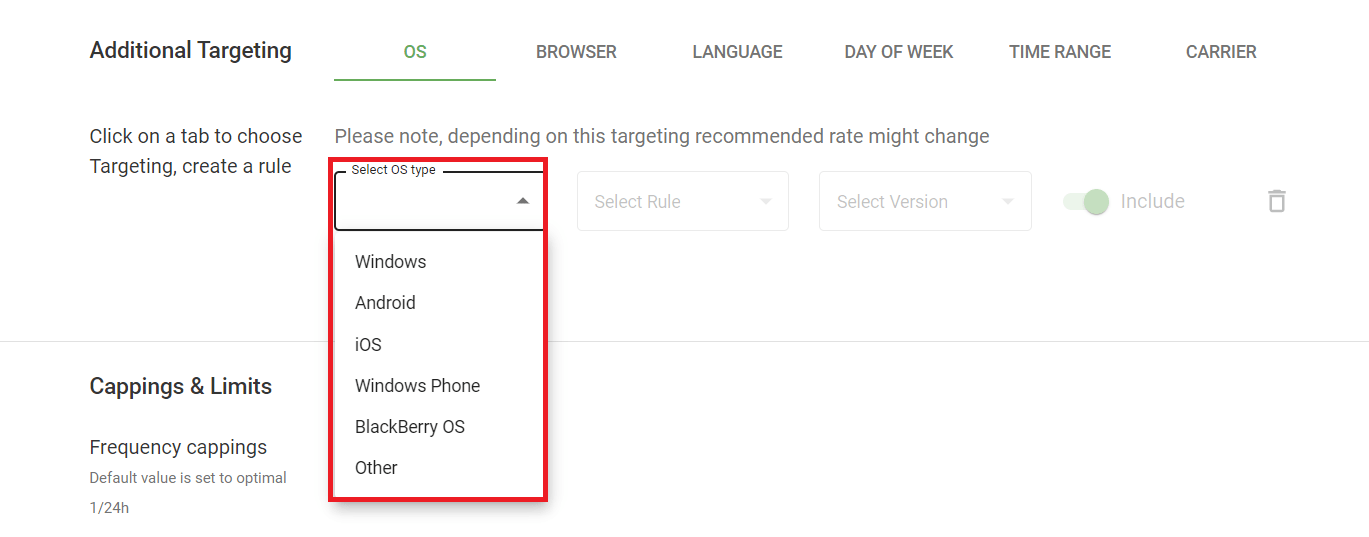
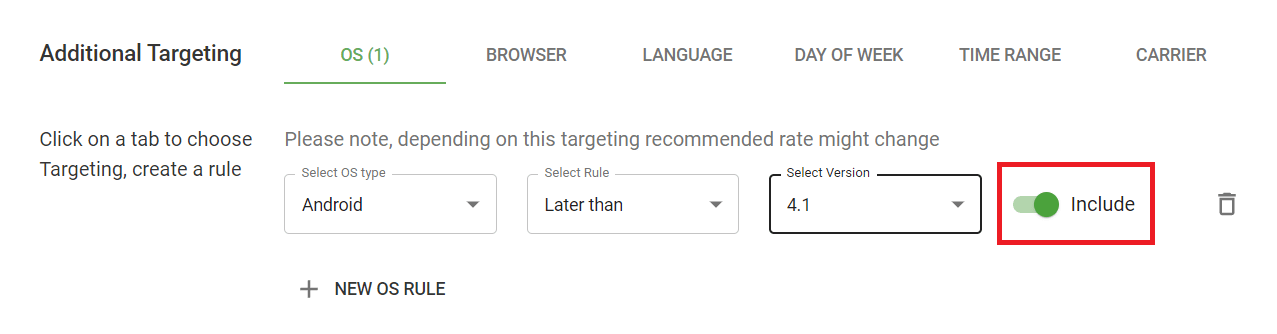
OS version
With Software and Utility campaigns, you will sometimes need to select users of a particular OS version, whether it’s Android, Windows, Mac OS X, or other. It often happens when the latest version of the software is unavailable for users of earlier versions, which means you should exclude those from your target.
With Adsterra, you can automate the OS choice. You won’t have to select every OS version you need manually. Just hit one of the bulk actions in the Select rule option:
- Is/Are
- Later than
- Starts with
- Earlier than
- Ends with
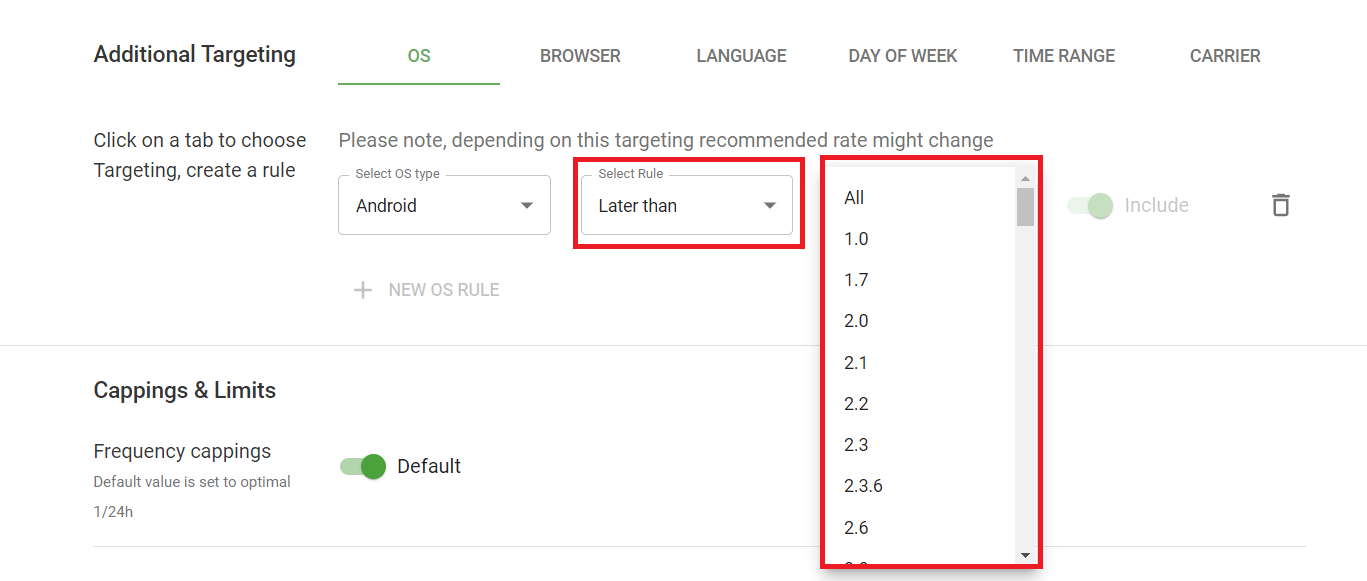
Finally, you will put the toggle to Include or Exclude position, and voilà – your OS version targeting is all set up! The same way, you can add other rules to include or exclude various operating systems from your campaigns. Now let’s move to the Browser targeting.
Browser targeting
It’s clear that Browser targeting is a must when you’re launching a campaign for, say, a Chrome Extension or a web application that runs only on Chrome and Safari. But this setting can help you a lot with almost any offer type.
While running a campaign, you will sometimes notice that users of a particular browser return loads of conversions Your move? Exactly! You will create a separate campaign targeting this browser with a higher payout. That’s what our partner did when he targeted his Dating campaign to Facebook browser users, gaining an ROI of 474%.
The opposite is also correct: exclude those browsers that perform worse or move them to a separate campaign with minimum bids.
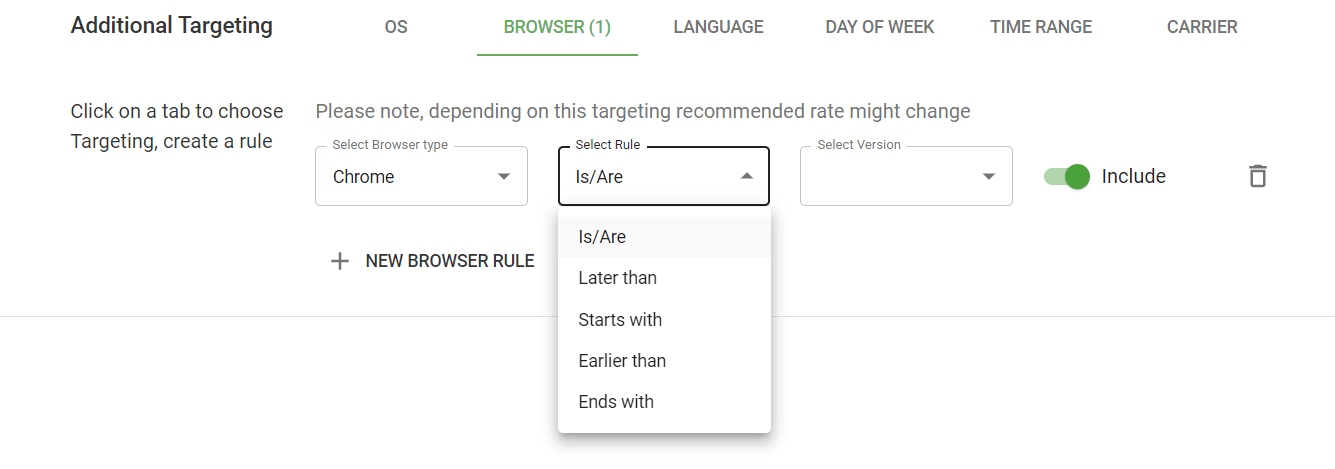
The logic behind Browser targeting is the same with the previous OS: you choose the browser, then, pick a rule to select further version, and finally, you pick the version to apply this rule.
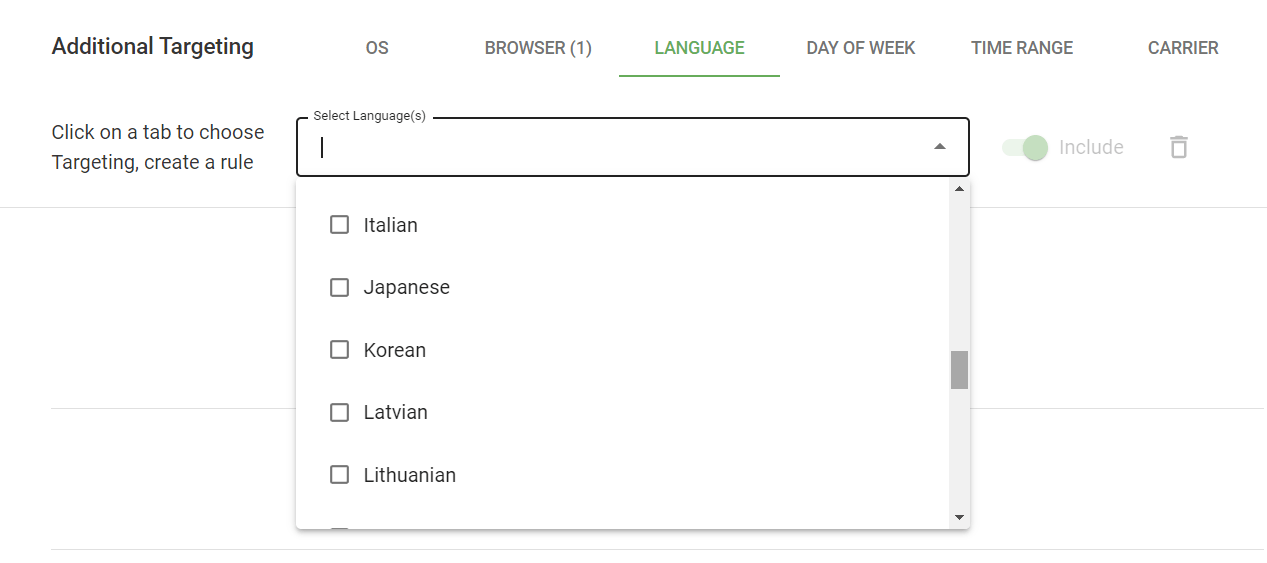
Language
When you target by language, you select only those users whose browser language matches your goals. This setting is necessary but a bit tricky. Here is why. Picking a specific browser language is great when you target, say, Spanish speakers in a non-Spanish speaking country like the UK. But this setting is obviously extra when you want to reach English speakers in the UK.
Mobile carrier
A gentle reminder: to choose among mobile carriers, ensure you’ve done with required settings:
- Device type: Mobile or Mobile+Tablet
- Connection type: 3G or WiFi + 3G
- Country
There will be a specific set of carriers for every country you advertise in. Suppose, you target Austria. Here is the list of carriers available:
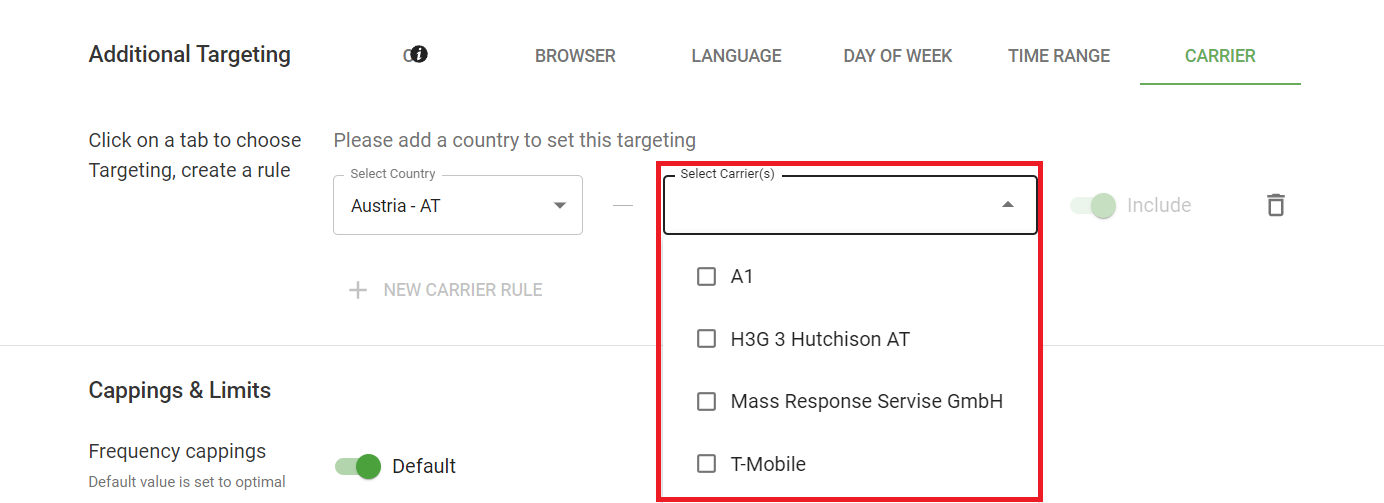
Mobile carrier targeting is vital when running a PIN Submit (aka Mobile Subscriptions) offer. Here, you will need to include only those using a specific mobile connection service provider.
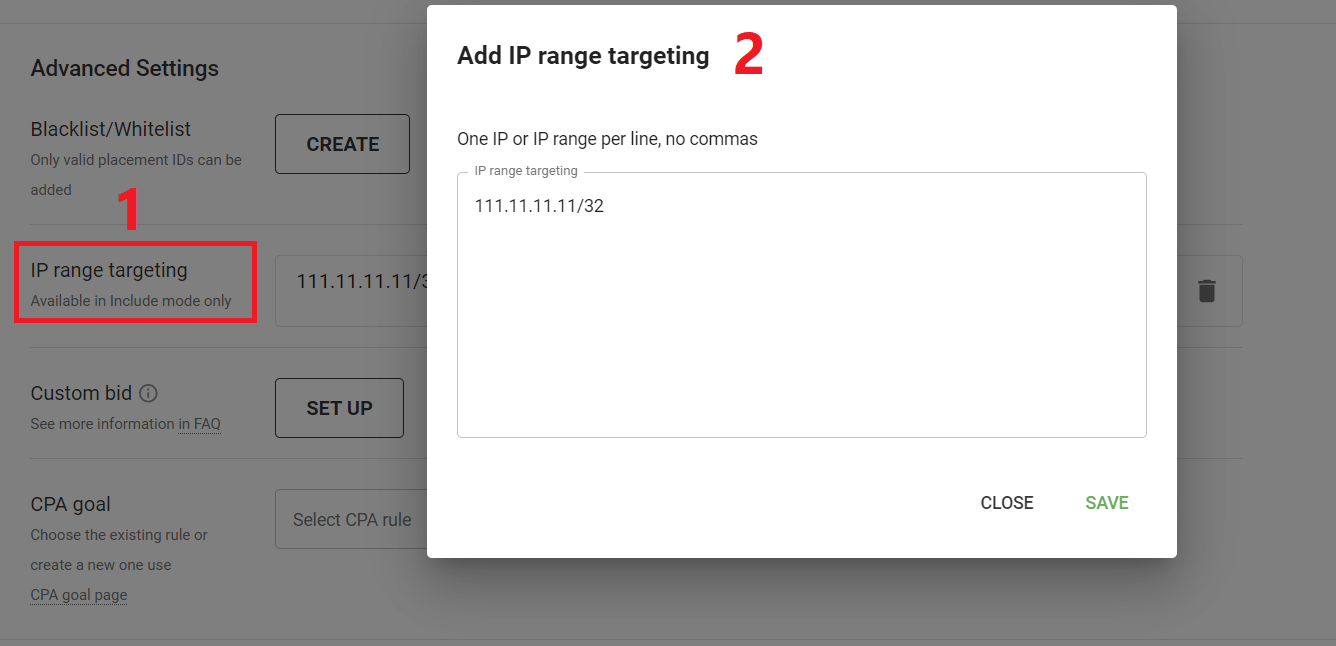
One more hint here. If you have a list of IP addresses to include in your campaign, you can also use it to specify your targeting. Scroll down to the Advanced settings section and paste the list of IPs. The IP range setting is only available in the include mode.
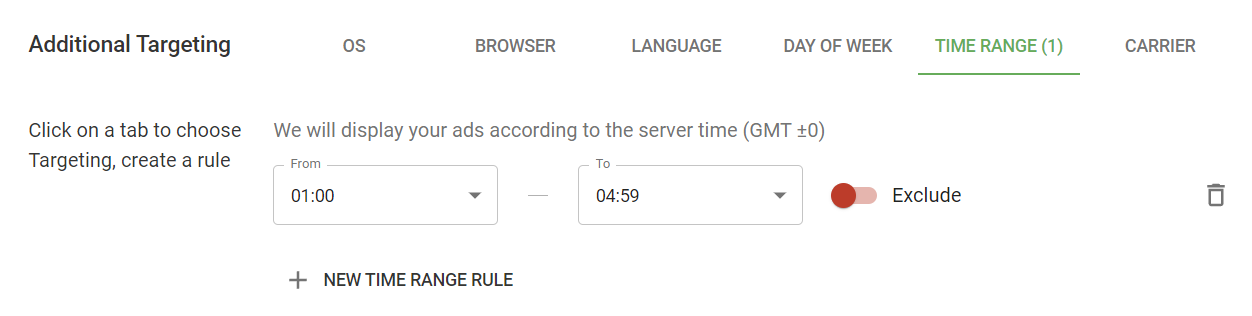
Day of week and Time range (only CPM and CPC campaigns)
When you include or exclude days of week or a time range, you decide when to show your ads and when to turn them off. These are critical settings for Finance and Trading offers which often include a phone call as a part of the conversion flow. We also call it the click2call flow. It’s when a manager calls you back to confirm your registration or an automated call is made to give you a secret key to verify your subscription.
Most of the activities based on phone calls are tied to the call center’s working hours. And you don’t want to waste your money rotating ads when no one can call users back, right?
By excluding low-activity hours or days, you can optimize the conversion cost and, maybe, even achieve a 2-fold player deposit boost like our partner from the iGaming sector did.
Basically, any offers with user activity peaks and drops require filtering by time range or days of week.
Adsterra displays ads according to the server time, which is GMT ±0. So make sure your offer with “Call 555…and win” is ON within the hours you intend to run it.
Well, we’re almost done with additional campaign targeting settings on the Self-Serve Platform. But I believe we must dig a bit deeper and check some brilliant extra options available for managed campaigns.
Extra targeting options (for managed campaigns)
UUID targeting
The next option I would like to spotlight is Universally Unique Identifier Targeting or UUID. It’s pretty much like retargeting; only it focuses on conversions. Adsterra collects data about conversions while your campaign is running. Afterward, we will launch a follow-up campaign to reach all those who converted, prompting them to make another purchase or target action. It’s pretty much like the cross-selling process when you incite your active customers to buy additional products or get an extended license.
Let’s make up an example that will make it all clear. Let’s say you’re running a campaign for an Android app. Users seem to like the app since they keep installing it. In the end, you have multiple trials, but fewer paid subscriptions bought. What can we do? Exactly! We’ll set up another campaign that will target only those users who installed the app to make them buy a paid license or an extended pro version. That’s the most straightforward way to a higher CR.
A sneak peak at advanced targeting:
Blocklists or blacklists / Whitelists or allowlists
One of the vital options for traffic optimization is blacklisting. I’m not going to get into particulars, as you have a more detailed guide to ad campaign optimization. All I want to highlight is that blacklisting & whitelisting should be applied only after you have run a test campaign, collecting sufficient data to decide which ad placements perform great and which don’t. Pre-defined lists may cause nothing but a waste of time because you can’t be sure which traffic sources and ad placements will return the best and worst results. We’ve got a great guide to blacklisting techniques if you want to take a deeper dive into this topic.
Let’s wrap up
That’s it about additional campaign targeting settings. You can now operate lots of options to adjust your campaigns and find the best-converting targets. Remember that before filtering traffic, it’s better to carry out a test campaign.
Be careful with over-optimization, as narrowing down your targets may result in zero CR and very low traffic volumes. If in doubt, drop a line to a live chat: Adsterra managers will advise on the most fruitful targeting settings. And see you!