We at Adsterra are a bit nerd about tutorials. But pro tips are incomparably better when it comes to actual practice. Hence, we invited our key expert and Head of CPA, Sasha, to walk you through the most challenging traffic acquisition stages. So, here’s your Adsterra campaign setup guide. It’s all here, from adding a landing page URL to submitting it for verification.

Head of CPA
Hi, everyone,
You know that Adsterra has developed its Self-Serve Platform, which is pretty easy to use. But it’s also feature-rich, so you might get confused if you have never used ad networks. I’m here to show you how to create and submit your first display campaign for flawless verification. And it will be just perfect if you sign up and complete all the main steps! Let’s ride!
Before you start the Adsterra ad campaign setup
1. Choose an offer
First things first, you need to get an offer to advertise. In other words, an URL you will send Adsterra traffic to.
Since it’s your first campaign, I recommend selecting a test offer with the most accessible conversion flow. This may be an install, download or even click. Sign in to your affiliate network or program and pick the offer you would like to try running on Adsterra traffic.
If you’re hesitating, check the Offers Wishlist on your Adsterra account. Here we list the examples of high-converting offers — just find them in your affiliate network or pick a similar one.
2. Save some screenshots of the target landing page
Remember to save some screenshots of the final landing page after you come up with the offer to try with Adsterra. If you plan to use a prelander, it is better to take its screenshot, too. This will save you time one day 😉 I’ll get back to this point a bit later. Now, just save some JPGs or PNGs making sure they are less than 350 kB each.
3. Check with Traffic Chart
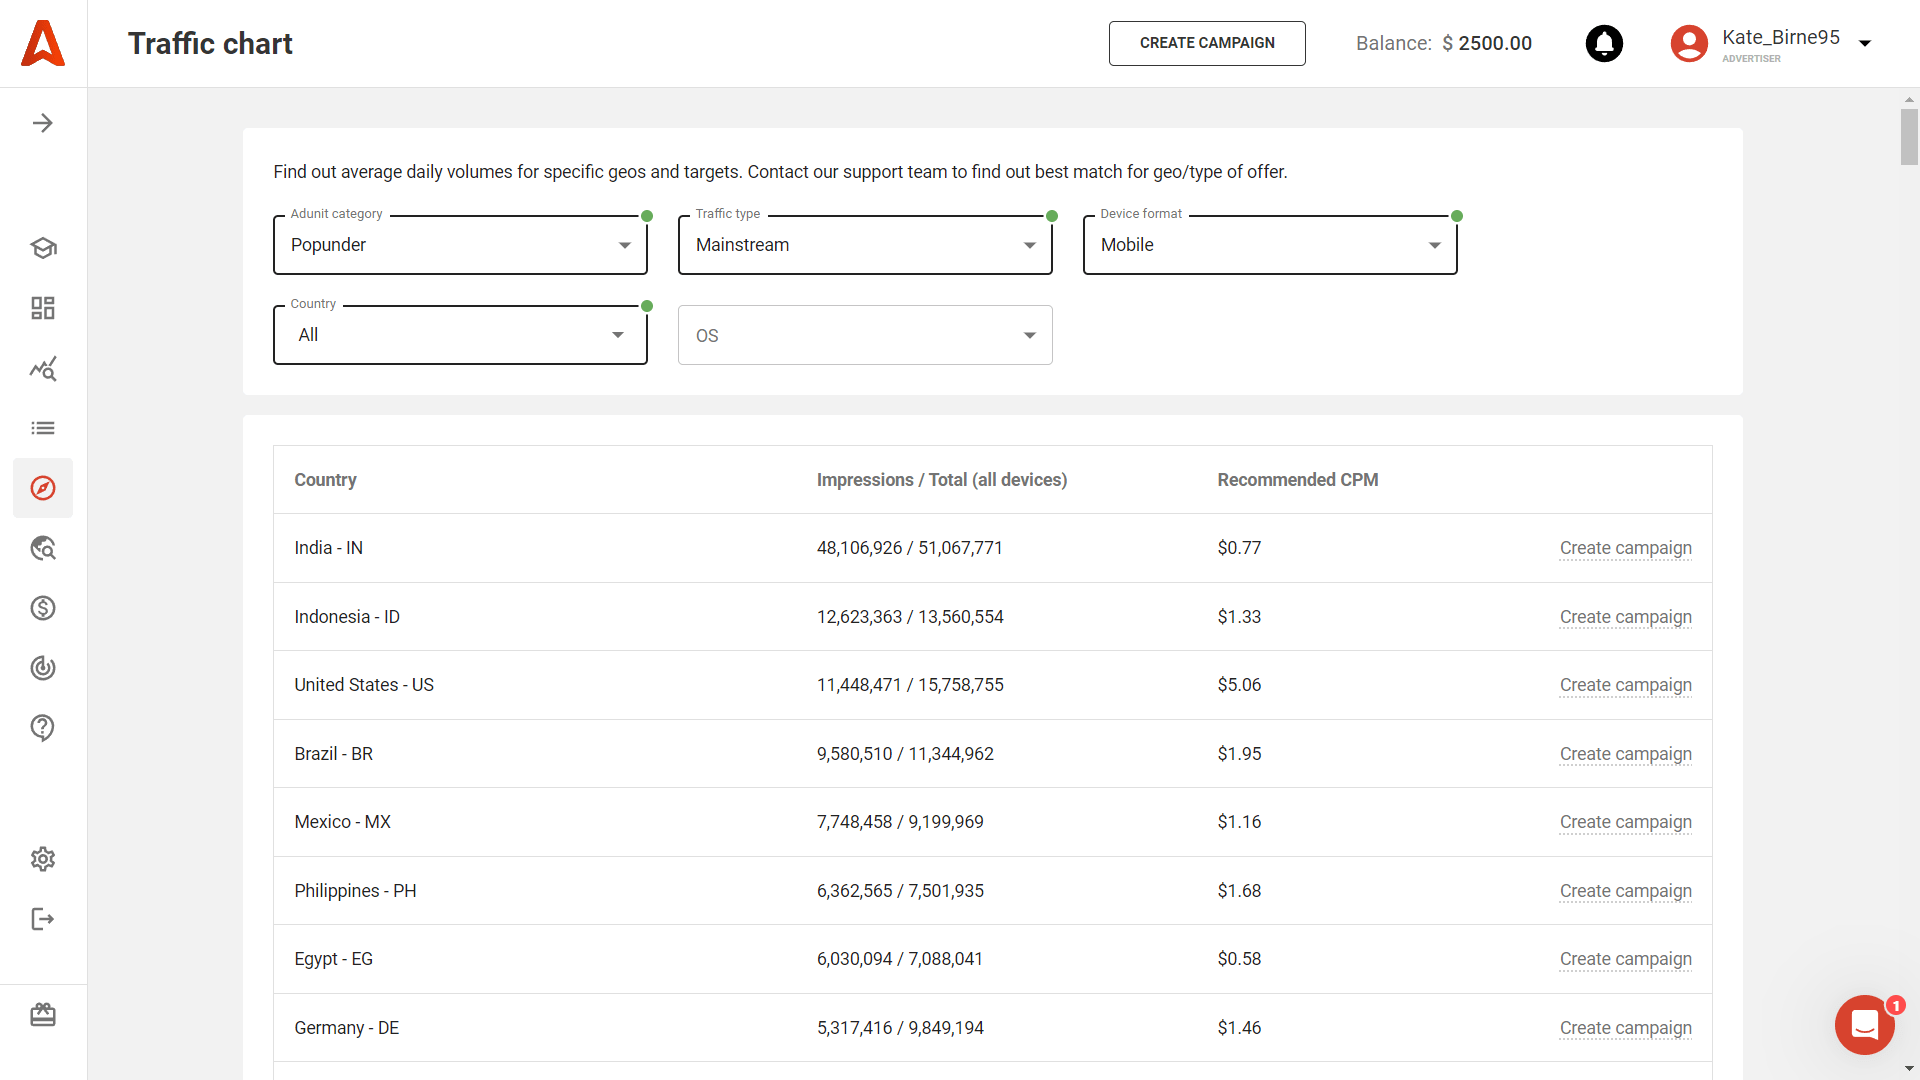
You don’t want to guesswork, do you? Then, before jumping into the Adsterra campaign setup, check for the available traffic volumes with our super-handy Traffic Chart tool. Pick it from the main vertical menu, and voila — you see how many ad impressions you will get for your geo, on which ad format, traffic type, and device. Recommended CPMs are also there.
Good job! Now you’re all ready for your first Adsterra campaign setup.
Important: Make sure the postback tracking is ok
You can carry on with the Adsterra campaign setup without tracking conversions. Our online platform’s stats will still deliver you ad placements, impressions, clicks, and more. But now, I will allow myself a slight turn to tell you more about tracking.
When running CPA campaigns, you use trackers not to miss a single conversion fired. And it will be pretty sad to start a campaign and realize that your postback fails to deliver those conversions. So let’s make sure the integration is OK or set it up from scratch.
From your Advertiser’s account, hit Tracking → Conversion Tracking. You’re on the Postback setup page.
Postback types
Start with choosing a postback type. Choose the one that matches your KPIs.
Simple postback tracks conversions without a payout. Use it if you buy traffic with a CPM model or if you’ve set up the conversion price in your tracker and don’t plan to send us this metric through postback.
Simple postback with a payout variable will send the conversion cost. The payout sent in the postback (whatever you have in &atpay=) is a primary price. Make sure you don’t send other prices.
Complex postback will send conversions with payouts in non-USD currencies.

Connecting to a tracker
Now move to step 2 and 3. Choose between the tracking systems we list or select Custom. Hit the GENERATE POSTBACK button. You can now copy the link and paste it into your tracking system.
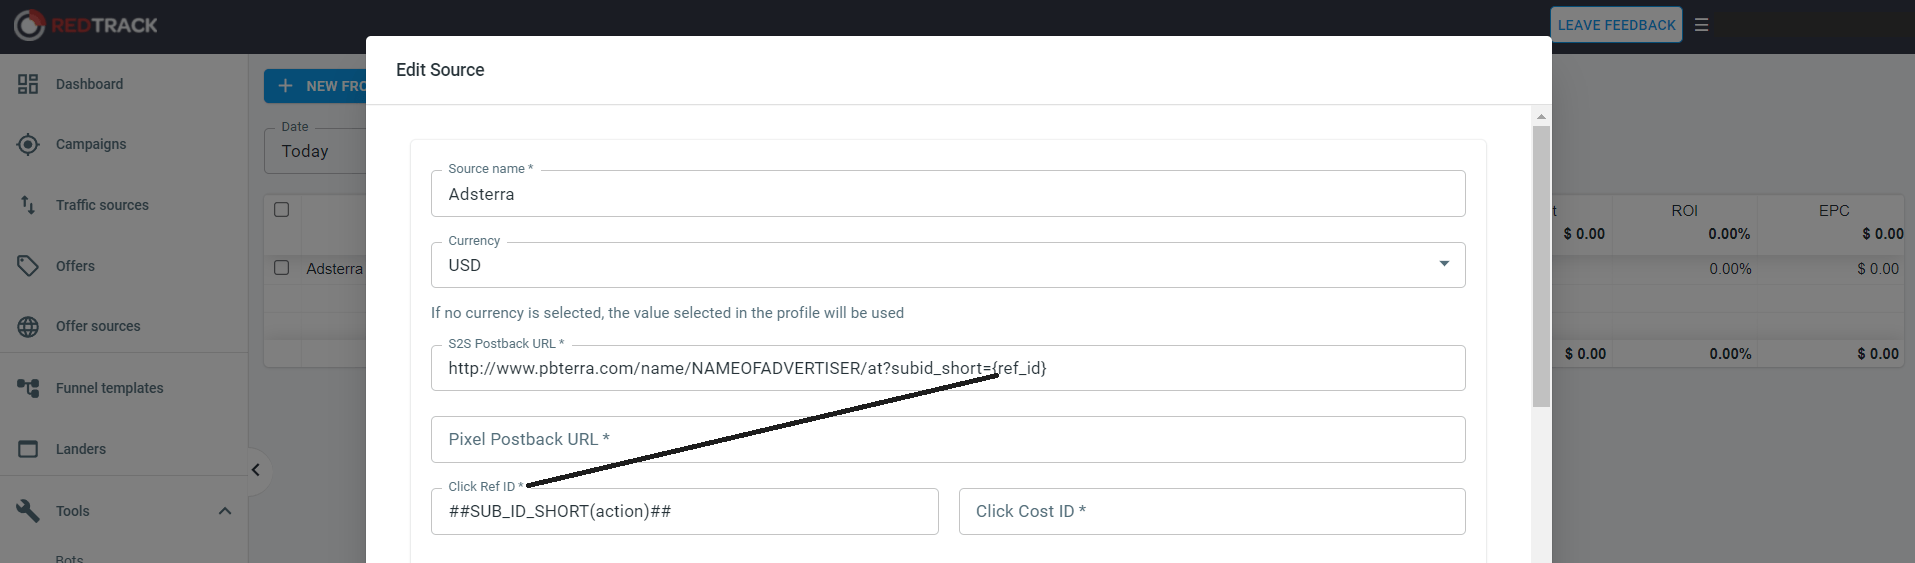
Make sure you match all tokens given in the postback URL between Adsterra and your tracker. The most critical token is the clickID, which sends each conversion event through an offer URL and returns it through the Postback URL. You will need to replace the clickID with the corresponding parameter from your tracker, matching it with the Adsterra subid_short.
Here is an example screenshot from RedTrack. ClickID is named as ref_id, so we placed the ##SUB_ID_SHORT(action)## right near this parameter.
Offer test
Ok, you matched tokens inside the postback URL. Now we’re ready to carry out a test. Go to your affiliate network and choose an offer. I would advise you to pick an offer with the most simple conversion flow; it will be easier to test if the conversion fires.
Generate an offer URL with a parameter ##SUB_ID_SHORT(action)##, which will deliver conversions. I would also recommend you to put the ##PLACEMENT_ID## to track traffic from different traffic sources. It will be especially helpful for your further campaign optimization. By the way, you can always check Adsterra tokens in our Help Center.
Now, jump to your Adsterra account. On the Conversion tracking page, find STEP 4 and paste the offer URL with all tokens you need.
Click the CHECK URL button. If you see the “Success”, then congrats — you’re all set!
Let’s now explore the Adsterra campaign setup process from A to Z.
Adsterra ad campaign setup from scratch
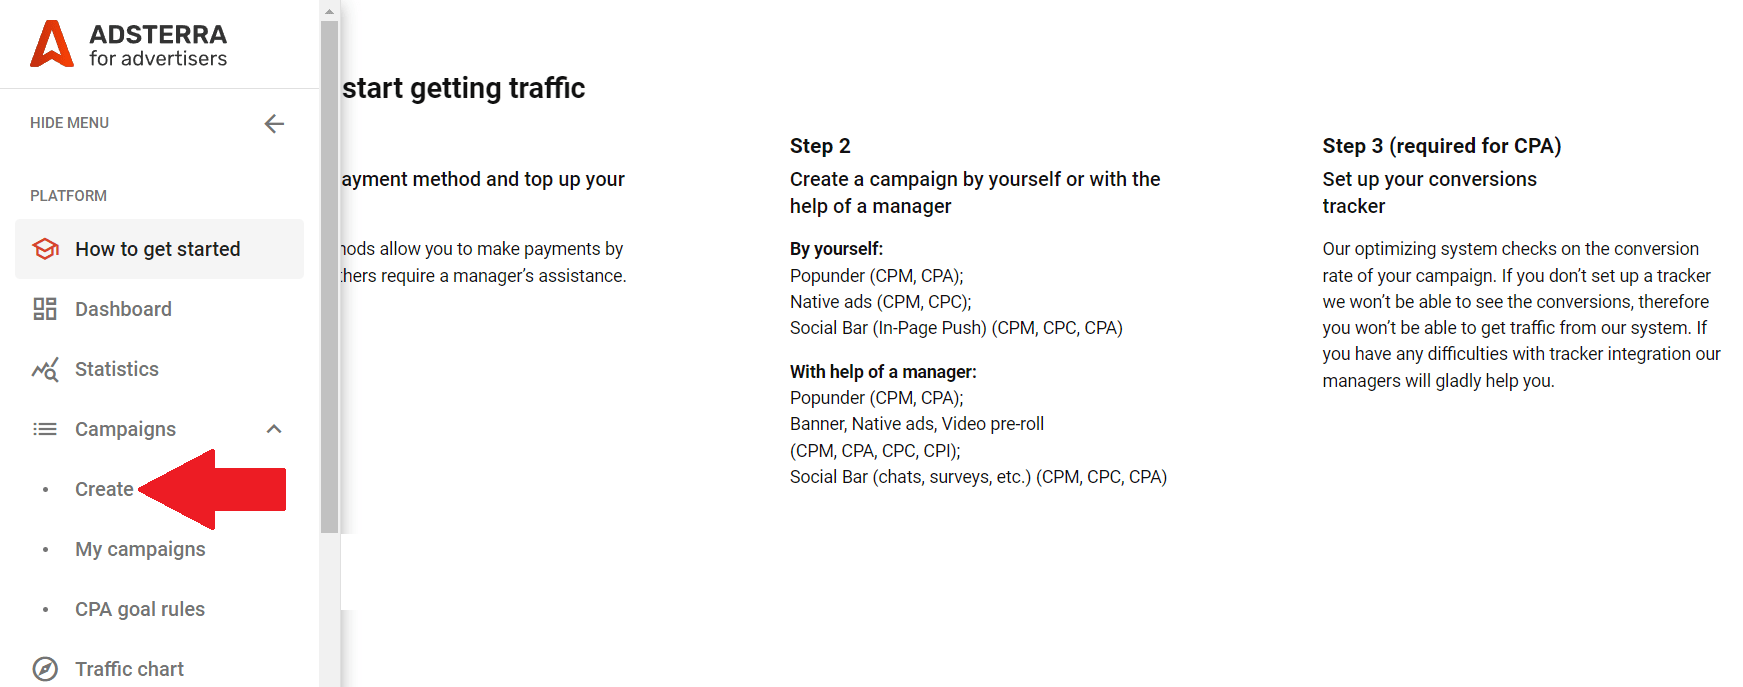
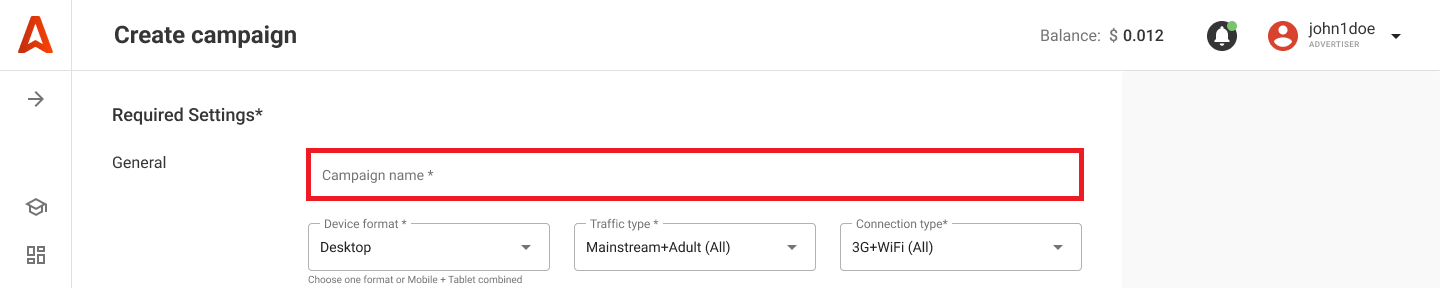
Now we’re back to the Adsterra SSP account. Click Campaigns → Create.
We’re going to carry on with the Required Settings now. These settings are a must for submitting a campaign for verification. And to begin with, make up the name for your test campaign.
Device type targeting
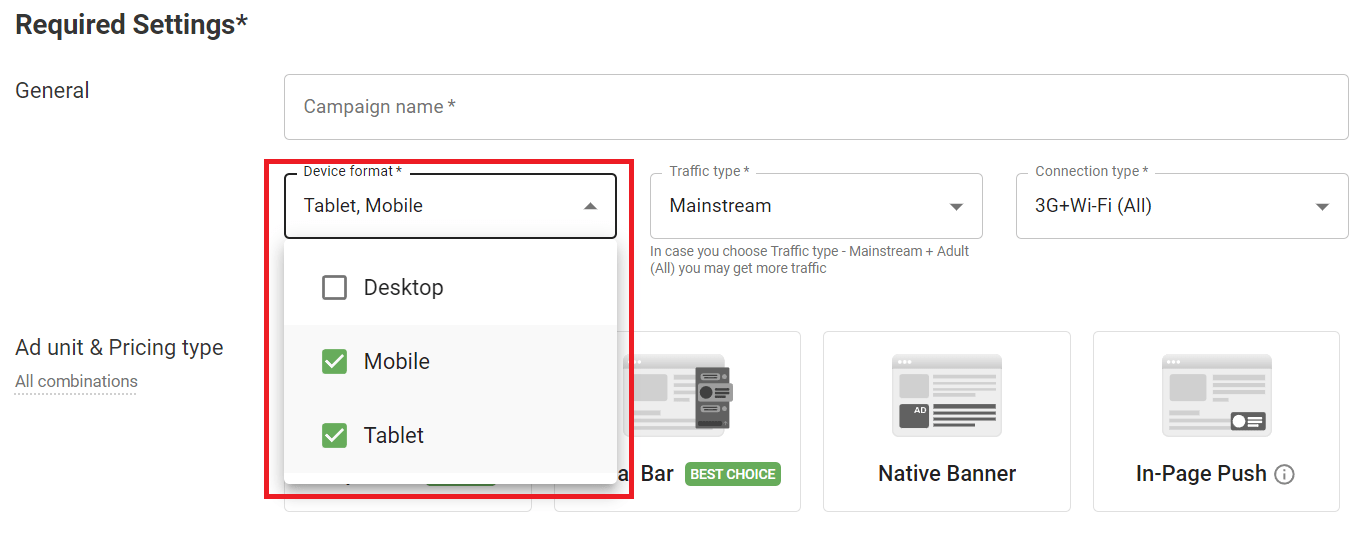
Choose which traffic sources – desktop or mobile – you will showcase ads on. You can choose one device type per campaign. Why so? This way, you’ll be getting much more clear stats about placements. If you want ads to appear on both desktops and mobiles, simply create another campaign with an alternative device type targeting!
Mobile and Tablets come as one, but you can leave only one of these.
Traffic type

We send both mainstream and non-mainstream traffic. Mainstream traffic, on average, fits any ad campaign. The non-mainstream type is best for niche audiences with specific interests: Entertainment, iGaming, Dating, etc.
The point is that both types can serve you well when you run, say, a VPN, VOD (video on demand,) or Sports offer. We recommend adding new traffic types when scaling ad campaigns and starting with both types if your brand allows you to be exposed on non-mainstream websites.
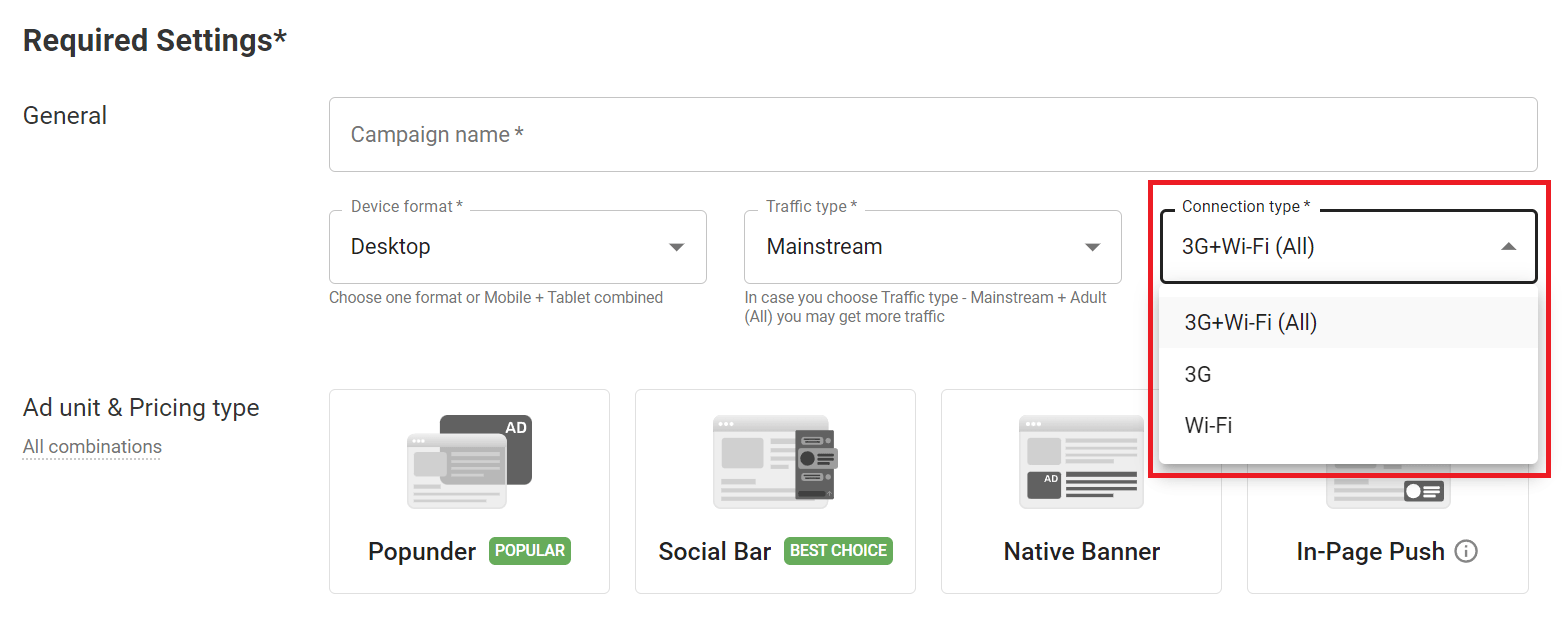
Connection type
Now, let’s decide on the connection type. Here you have three options: all traffic, Wi-Fi, and 3G (which is also 4G/LTE.) The 3G option will be the right choice if you run a PIN Submit / Mobile Subscription offer. This parameter will allow you to target mobile carriers within your geo later.
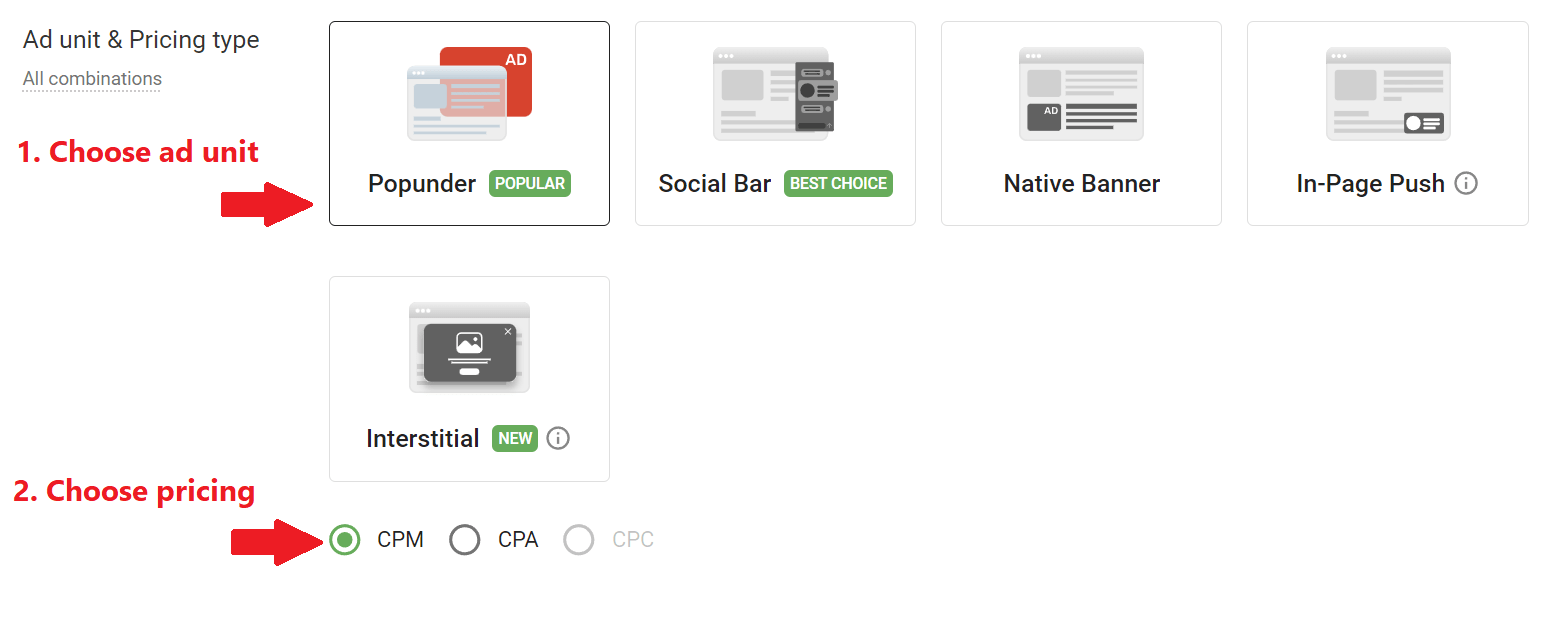
Ad unit (aka format)
The Ad Unit field is all-important, as you have to come up with HOW your ads will look like (with creatives or without them) and how much traffic you will get. With Adsterra, you choose between ad units:
- Popunder
- Social Bar (a combo of display and in-page push creatives)
- Native Banners
- In-Page Push
- Interstitials
Popunders are still No1 for affiliates. You can launch a campaign much faster since Pops don’t require creatives. One of the most direct ways of reaching out to your audience, Popunder sends about 11.9 billion monthly impressions.
Popunder’s closest rival is Social Bar, which is an advanced display format packed with over 20 most-converting template creatives. You also have In-Page Push, the best replacement for web push advertising. And finally, an extra-effective Interstitial unit. The latter is a full-page display format with multiple variations for showcasing your offer in the most engaging way.
Depending on the Ad Unit, you pick the pricing type. And we’re about to explore this stage!
Pricing type
Next comes the pricing type — you have CPM, CPA, or CPC at your service depending on the ad unit you picked before.
- Popunders: CPM and CPA
- Social Bar: CPM, CPC, CPA
- In-Page Push: CPM, CPC, CPA
- Native Banners: CPM, CPC
- Interstitilas: CPM, CPA
When you run offers with fast conversions, then my advice is to pick the CPA pricing. You will only pay for actions completed. Installs, trials, downloads, single and double opt-ins (SOI and DOI) are fast conversions. Even a click can be a conversion!
What if you run an iGaming or Finance offer with a hard conversion flow (e.g., deposits)? Try CPM model. It’s cheaper, helping you distribute budgets, catching as many conversions as possible and eventually it can be cheaper than you expected.
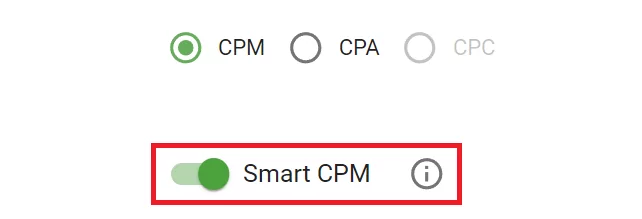
Smart CPM pricing
If you’re not a seasoned marketer with a decade of experience using display ad networks, I recommend looking closer at the Smart CPM tool. It’s an automated second-price auction algorithm.
You enter a bid (slightly increasing it), and Smart CPM starts competing for traffic. It participates in real-time auctions and buys CPM traffic. You will only pay higher than the next highest bidder and acquire ads at the lowest possible cost.
Landing URL
Our next stop is entering your landing page URL. This option comes right after you pick Popunder. If you picked any other ad unit, the following step will be uploading a creative. Let’s agree, we chose Popunder, so now we’re now going to deal with the URL.
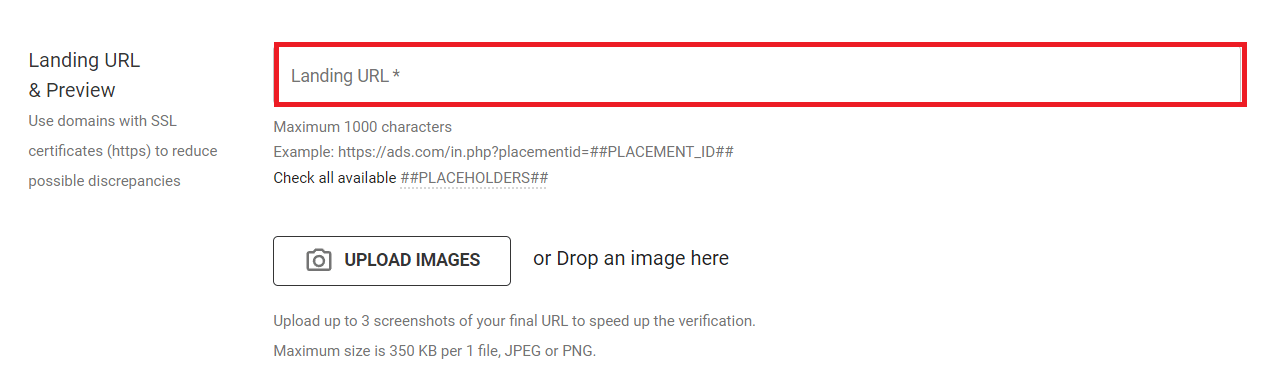
Paste your offer URL with all tokens you need to track. I highly recommend to use ##PLACEMENT_ID## along with the obligatory ##SUB_ID_SHORT(action)##. Oh, and the ##COST_CPM## token is necessary if you want to apply our smart Custom Bid feature that helps you spend wisely on those sources that send you the best traffic.
Landing preview
Remember I advised you to take some screenshots? Here’s why. Under the Landing URL field, you can attach the previews of a landing page and a prelander.
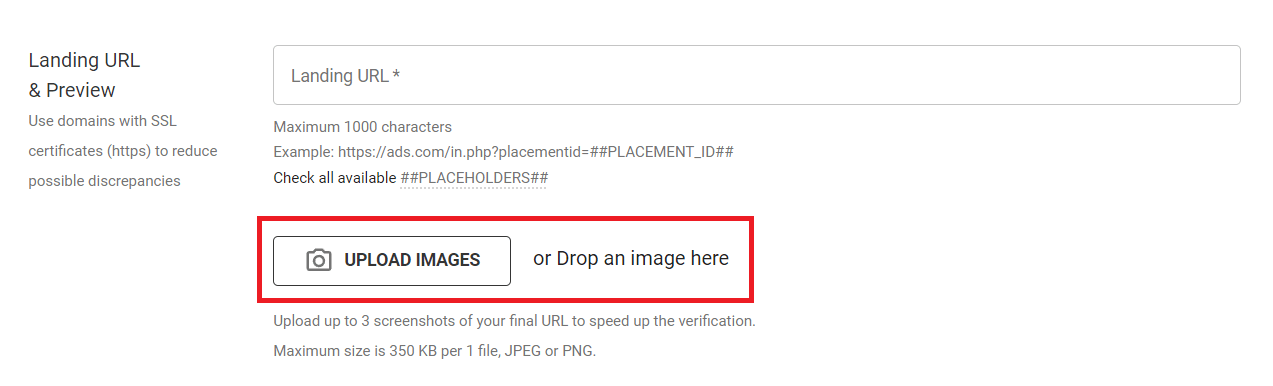
Our moderators always check landing pages to match our policy. We emulate the targets you set to check your links, but sometimes it can be a tricky task. But with screenshots attached, you can verify your campaign faster. If you run a Smartlink campaign please attach several screenshots of all offers you have in rotation.
Creatives
If you decide to run any other unit except for Popunder, one more step is required: uploading advertising creatives. Let’s assume, we picked Interstitial. Click the + NEW CREATIVE big button.
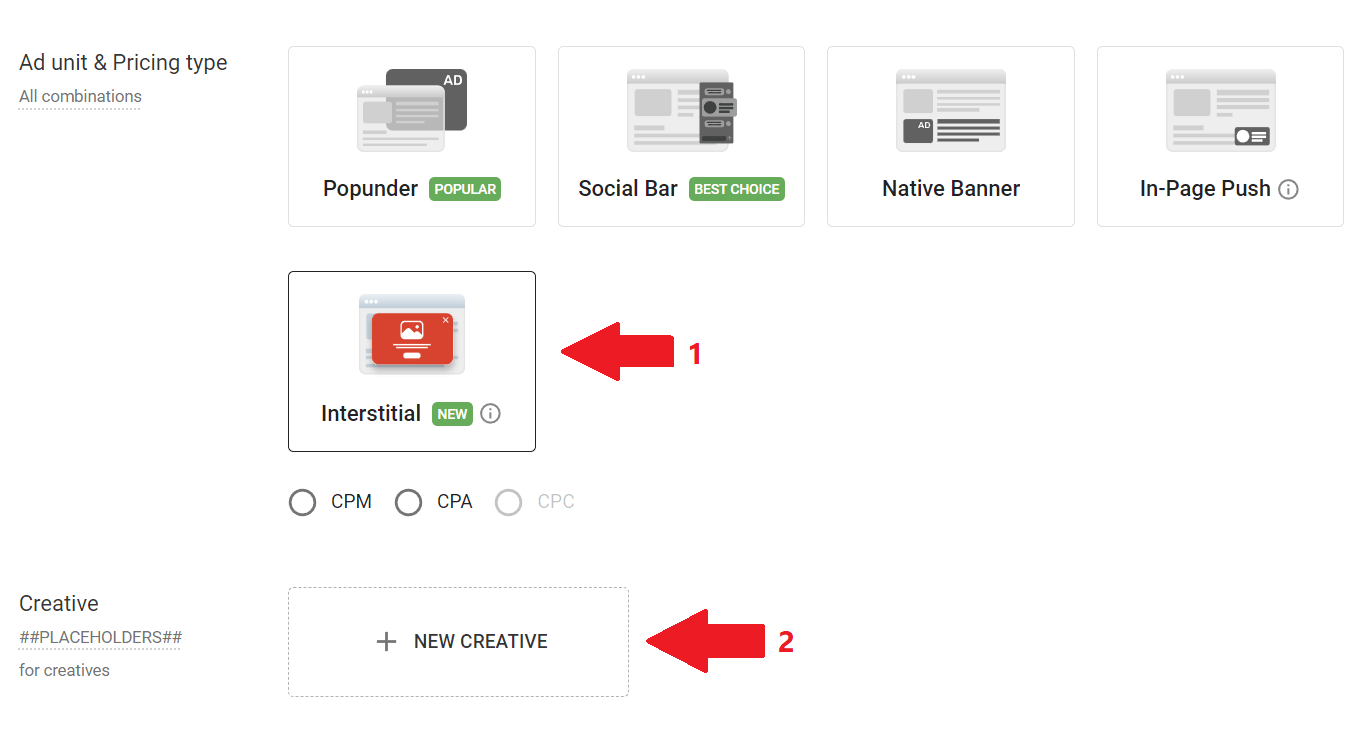
Check all placeholders (or tokens) you can add to your landing page URL to be able to track creatives’ performance full blast. One of those is ##BANNER_ID##, which is a unique ID of an advertisng creative.
On a new popup, you will see Interstitial preselected, so carry on and explore all skin types (Big Banner, Notification, System box, Vignette) and styles.
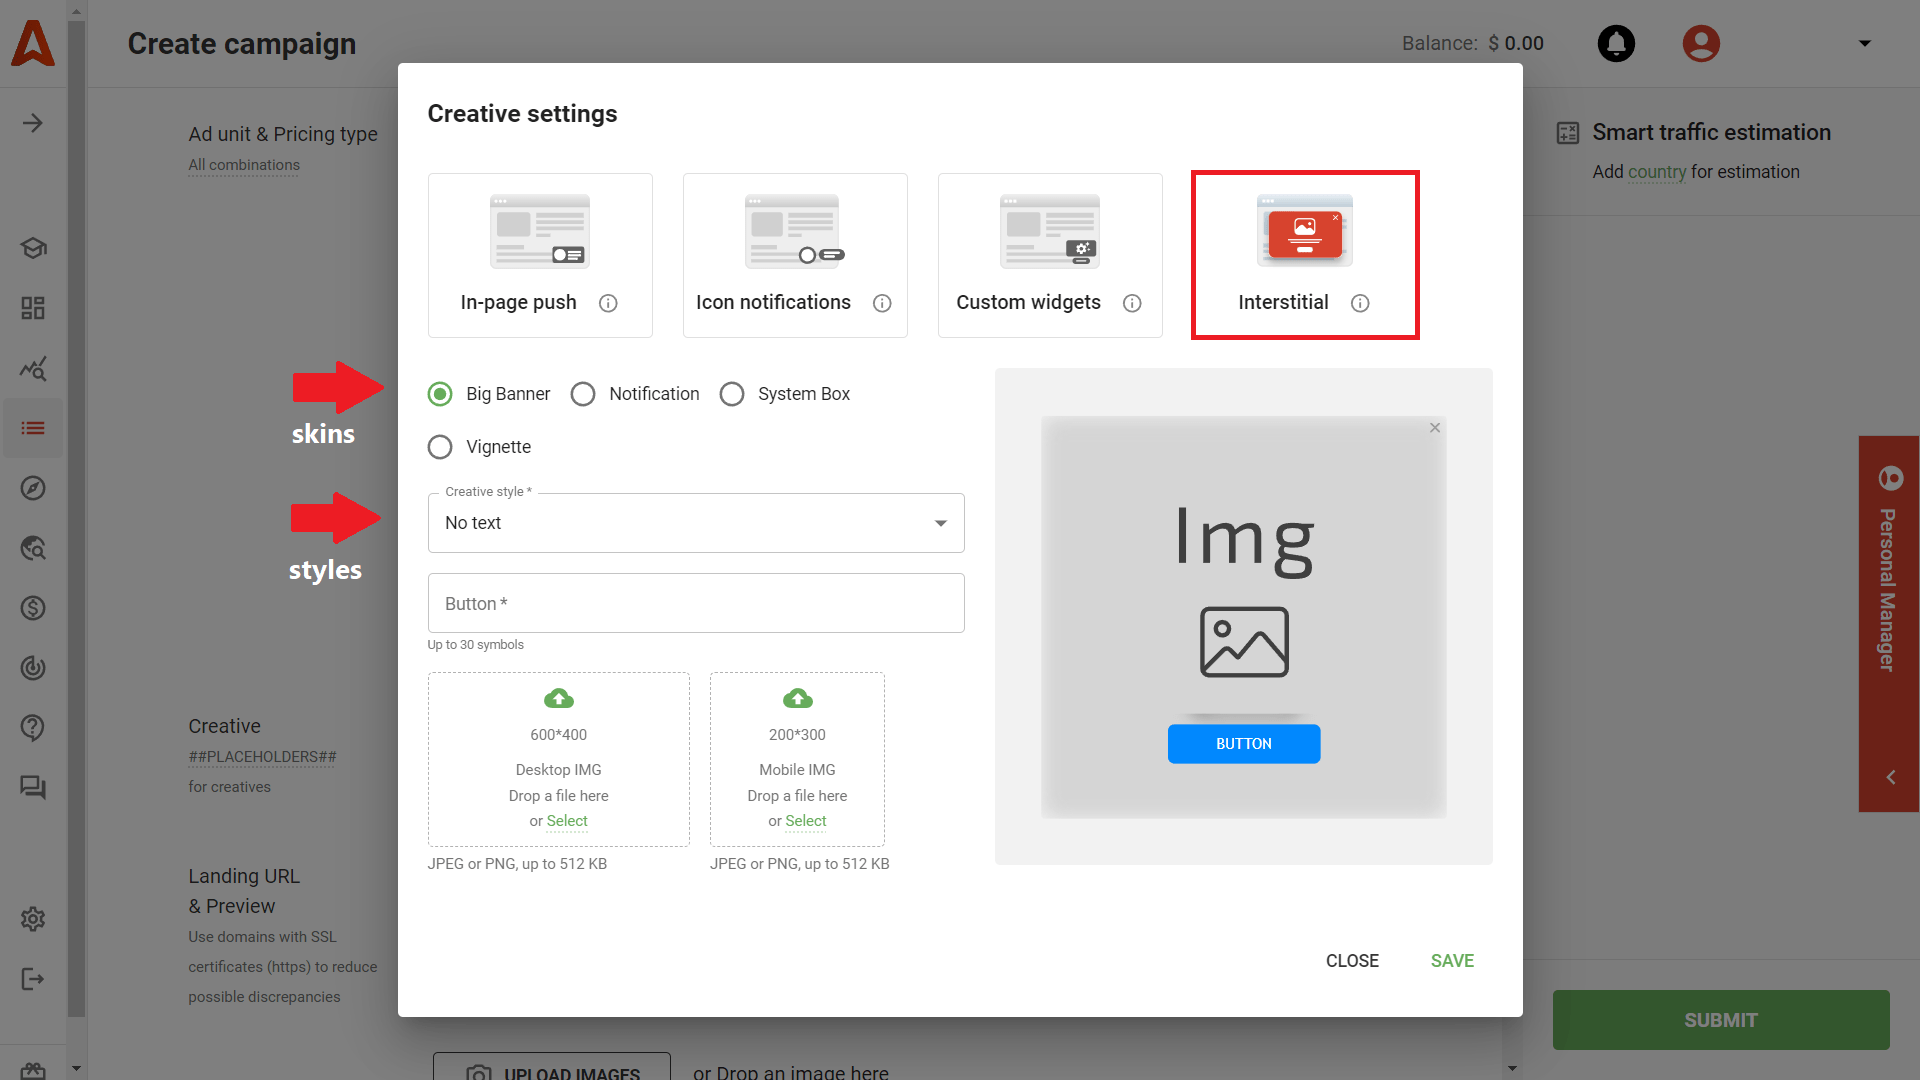
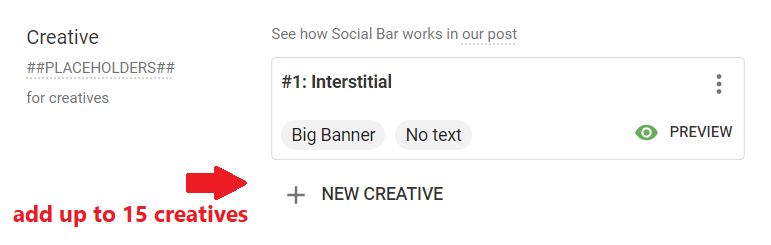
All following settings are pretty clear. I just want to remind you can upload up to 15 totally different creatives to your test campaign. And remember to hit SAVE after you’ve finished. Your creatives will appear as previews on the Campaign page.
Country
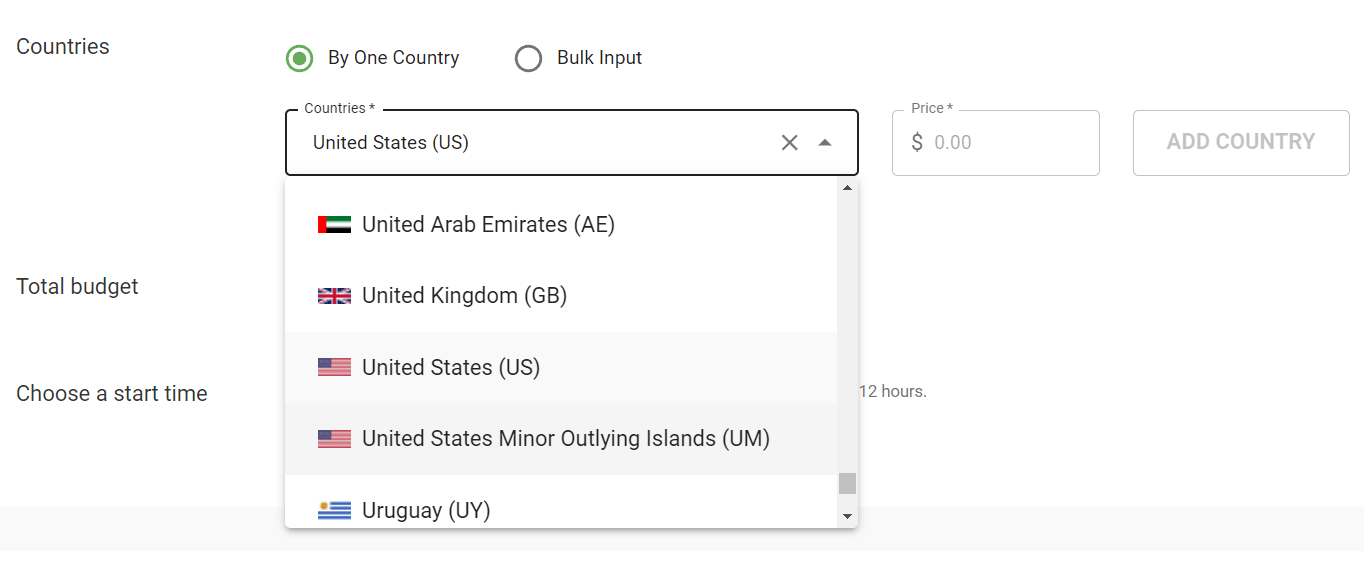
Geos are the heart of your targeting. And we’ve reached the point where you can pick one. Actually, we allow for a bulk input, but in many cases, the rule of thumb is “one country per campaign,” as it makes the campaign optimization much more manageable.
Pick a country from the dropdown, and we’ll carry on with the bidding tactic.
Bidding
Bidding is choosing a price for 1,000 impressions (CPM), one click (CPC), or one conversion (CPA). When you pick a country, AI algorithms evaluate your competition’s bids and display minimum and recommended payouts. I advise not to overbid and start with the recommended CPM or CPC payout.
Remember: If you picked Smart CPM to automate traffic acquisition, here you’ll have to increase your bid a little. But avoid placing the highest payout.
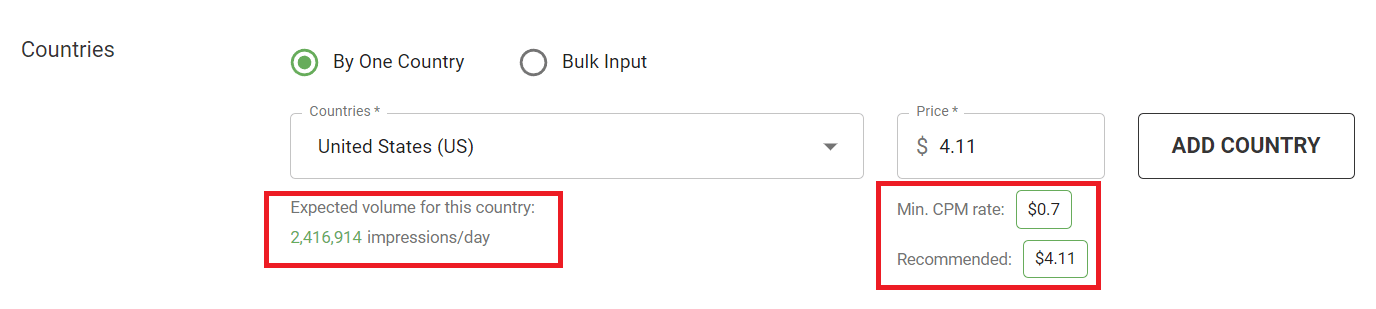
Smart Traffic Estimation also delivers you the expected number of impressions you will get at the start. Use this clue to evaluate how much you will need to spend daily.
Summarizing: to add a country to your campaign, you need to pick it from the dropdown, then enter a bid in the Price field, and click ADD COUNTRY.
Budgeting
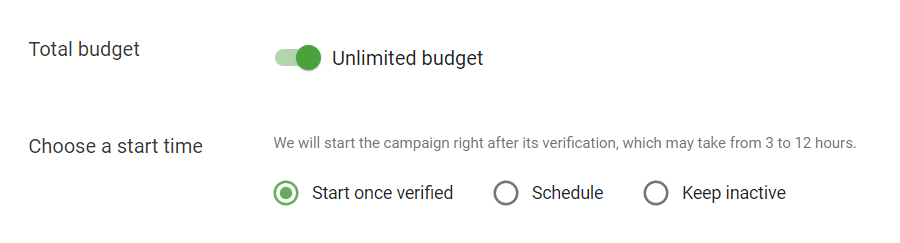
Your first Adsterra ad campaign setup is almost complete. Now we’re going to enter a total campaign budget, which I recommend to leave Unlimited. The toggle for CPM campaign is already ON.
For CPA campaigns, we also require you to enter a test budget. Why so? All test CPA ads are charged on a CPM basis. This allows to embrace more traffic, ensure the offer is interesting to your target audience, and save money, of course. Check our latest updates on the recommended test budgets.
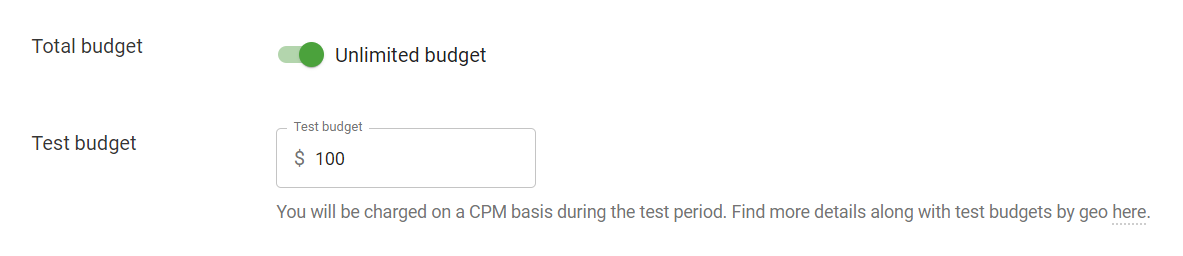
Please note: the minimum and maximum test budget values for a CPA campaign are $10 and $500. Your test budget amount should not be higher than the total budget amount.
Budget limits
Ok, I feel you’re a bit hesitating about unlimited budgets. No worries, you won’t overspend. Just scroll the page until you see the Cappings and Limits section and find Budget. That’s an extra setting, and I recommend you to check all of them in my next guide to campaign targeting.
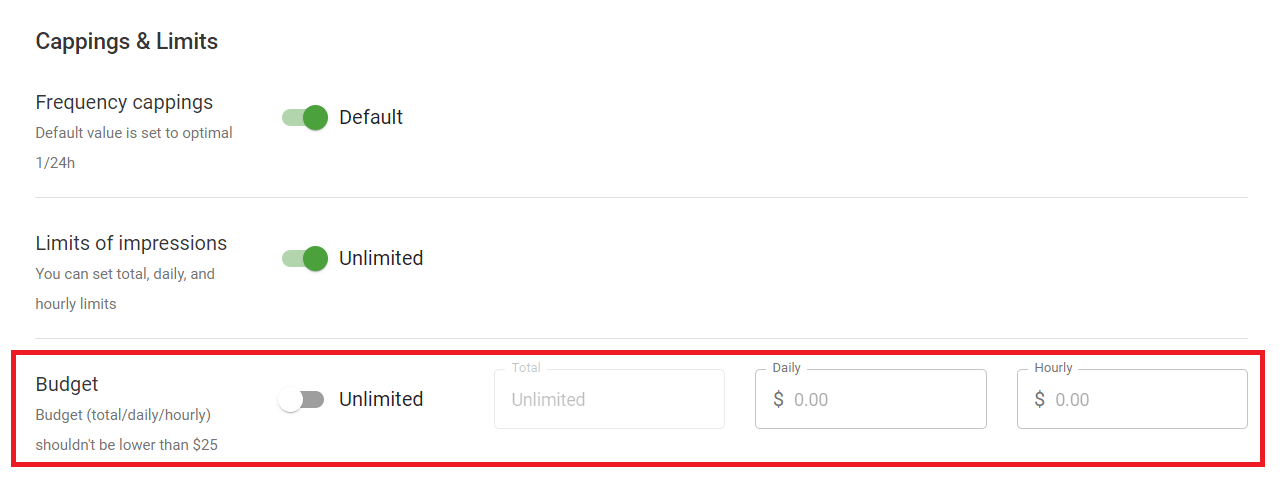
Just set the toggle to the OFF position and enter acceptable daily or even hourly limits to control over spending. Be sure, you won’t jump over these limits!
Final steps of the Adsterra campaign setup
When to start your campaign
Finally, you should choose when to kick off the campaign. You can either schedule it for a specific day or start immediately after verification. The third option is to leave your campaign inactive till you shoot it manually. If you have topped up your balance, I advise you to start after the verification.

How to submit the campaign for review
Now you’re all set. Click the SUBMIT button and read through the Preview page carefully, checking every setting made.
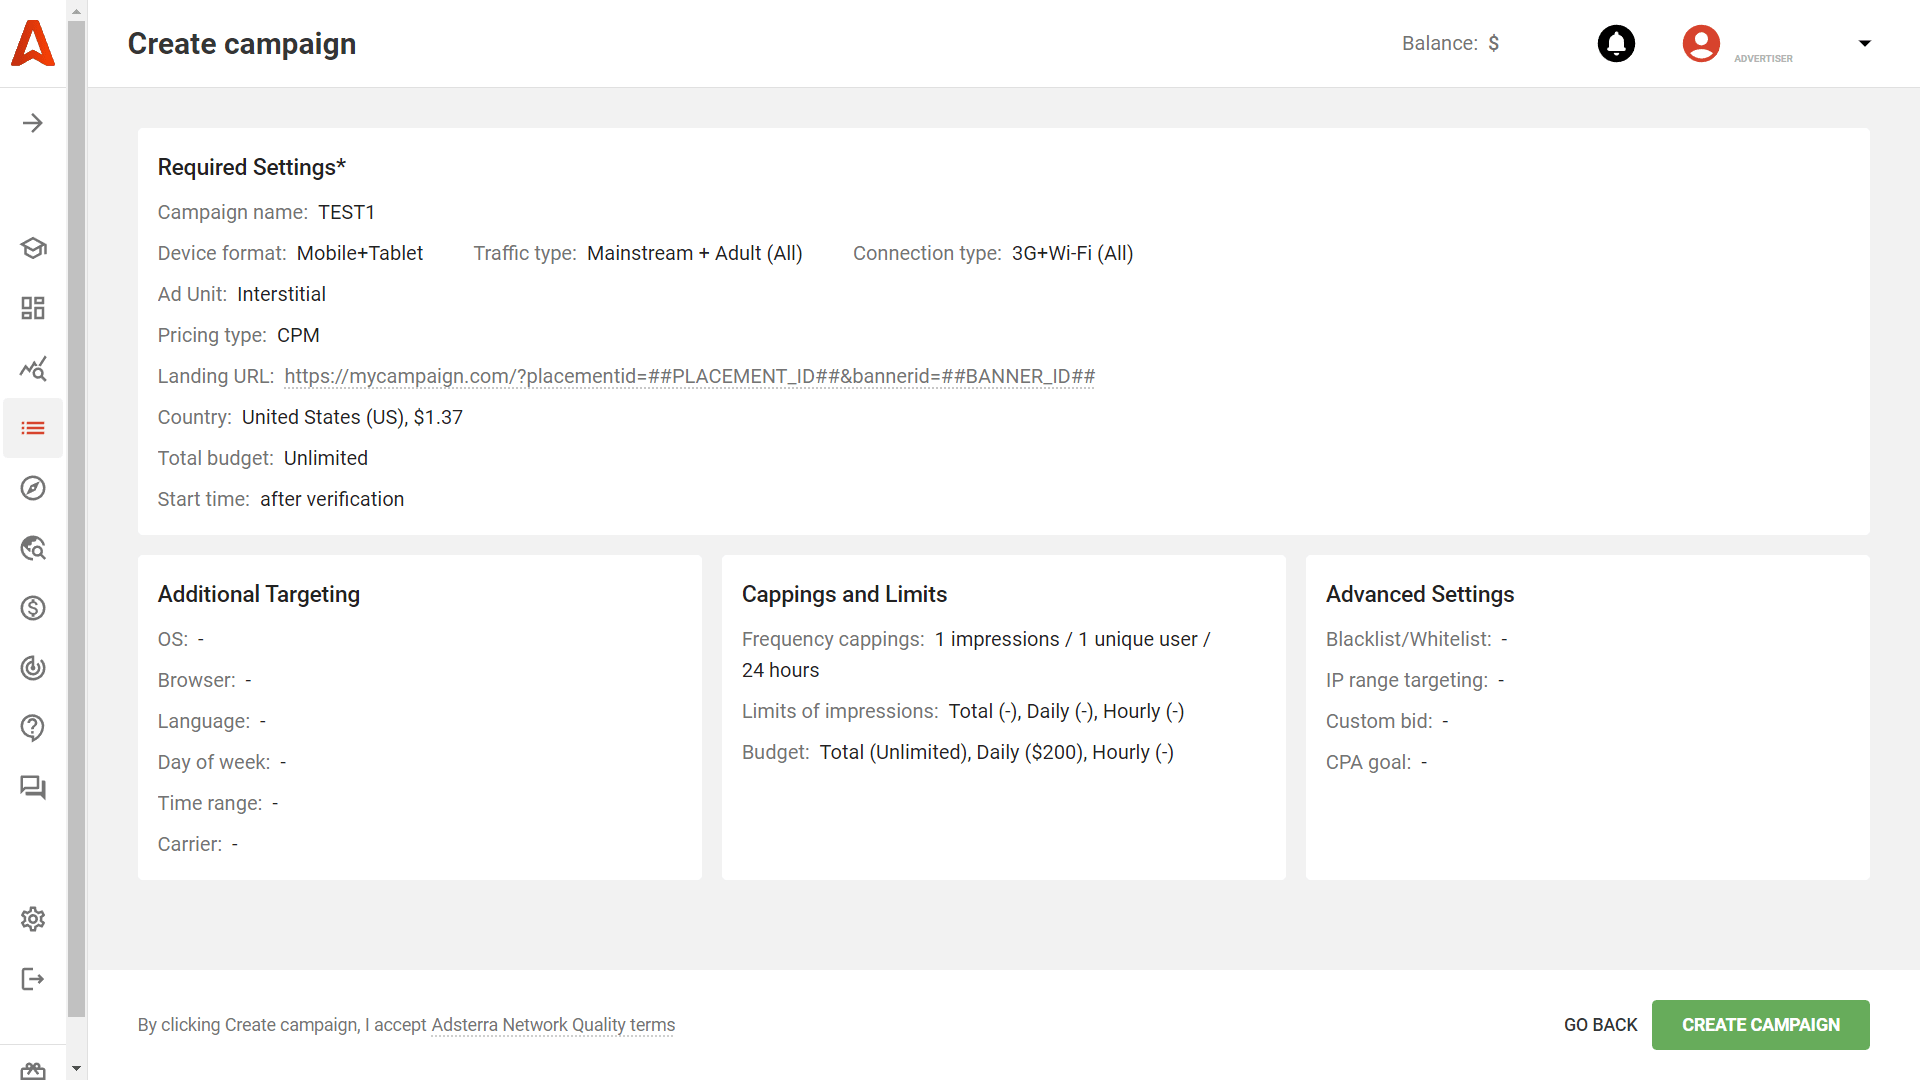
Then, send your first campaign to verification by clicking CREATE CAMPAIGN. Our support team is online 7 AM – 7 PM GMT+0 (personal managers are online Mon-Fri, 8 AM – 5 PM GMT +0). So, you can ask us anything that causes concerns and doubts:
- optimal bids;
- creatives;
- black- and whitelists,
- optimization tips.
These were not all settings you can use. I listed only those necessary for a smooth campaign launch. There are many targeting options that will help you slice traffic and find the best targets.
Summary
- Since it’s your first Adsterra campaign, it is better to start with general settings and wide frequencies. Avoid over-optimization when on the start point; you aim at getting nice traffic and then sift it out to find the best matching.
- Stay in touch with our managers not only when you’re stuck with optimization but to hook helpful insights about trending creatives and competitive bids.
- If you’re not aiming at worldwide reach, it is wise to create a separate campaign per each GEO you need. The same is fair for device types.
- Stay persistent when testing traffic, and if hesitating about possible spending soars, set daily budget limits.
- When you create ads, utilize multiple templates and upload as many designs as possible.
If not now, then when? We mean, it’s about time for your first Adsterra campaign setup.